My Experiment With Free
Filterstorm started big. It was a free app at the time of iPad launch, and thanks to an early staff favorites feature, it hit number 11 on the free apps sales chart. The reason I launched it as a free app wasn’t business savvy (though in hindsight I’m glad I did), it was simply that I had developed Filterstorm without access to an iPad and I didn’t trust it to run properly — and at first it didn’t.
Inkist’s launch was a very different story. I set the price where I wanted it to stay, and simply released it hoping again that word of mouth would spread it. Of course, it turns out there are fewer mouths to spread the word when people have to pay $9.99 to get the app. I did have a big banner feature which helped, but not enough.
It seemed I needed something more. My first thought was a demo version, something that expired after 30 days you could get from the Inkist website. I like going through the app store, though, and demo versions don’t work for that. So I decided to go in a different route, by which I mean “shamelessly copy from Autodesk’s strategy with Sketchbook”.
Sketchbook Express is a free version of Sketchbook which flattens the images when they’re saved (there are probably other limitations, but that’s the only one I’m aware of). That seems to me to be a good way to do things, give people a good taste of the abilities of the program but with enough limitation that people will want to upgrade.
I thought about doing the same limitation as Sketchbook Express, but having a flattened image on save would hurt people who start working on an image in Inkist Lite and want to finish it when they upgrade to Inkist. Instead I simply set a limit of 3 layers available to the user. This makes it a powerful enough app that people can get real use from it, and many may want to stick with the lite version, but limited enough that more serious users will all want to upgrade to the full version.
I think there is a danger that I’ve made the limitations too loose and most people will be happy with Inkist Lite, but as Filterstorm is the vast majority of my income, this is a risk I can afford to take. If I’ve played it right, hopefully I’ll see the word spread and sales of the full version will go up, too.
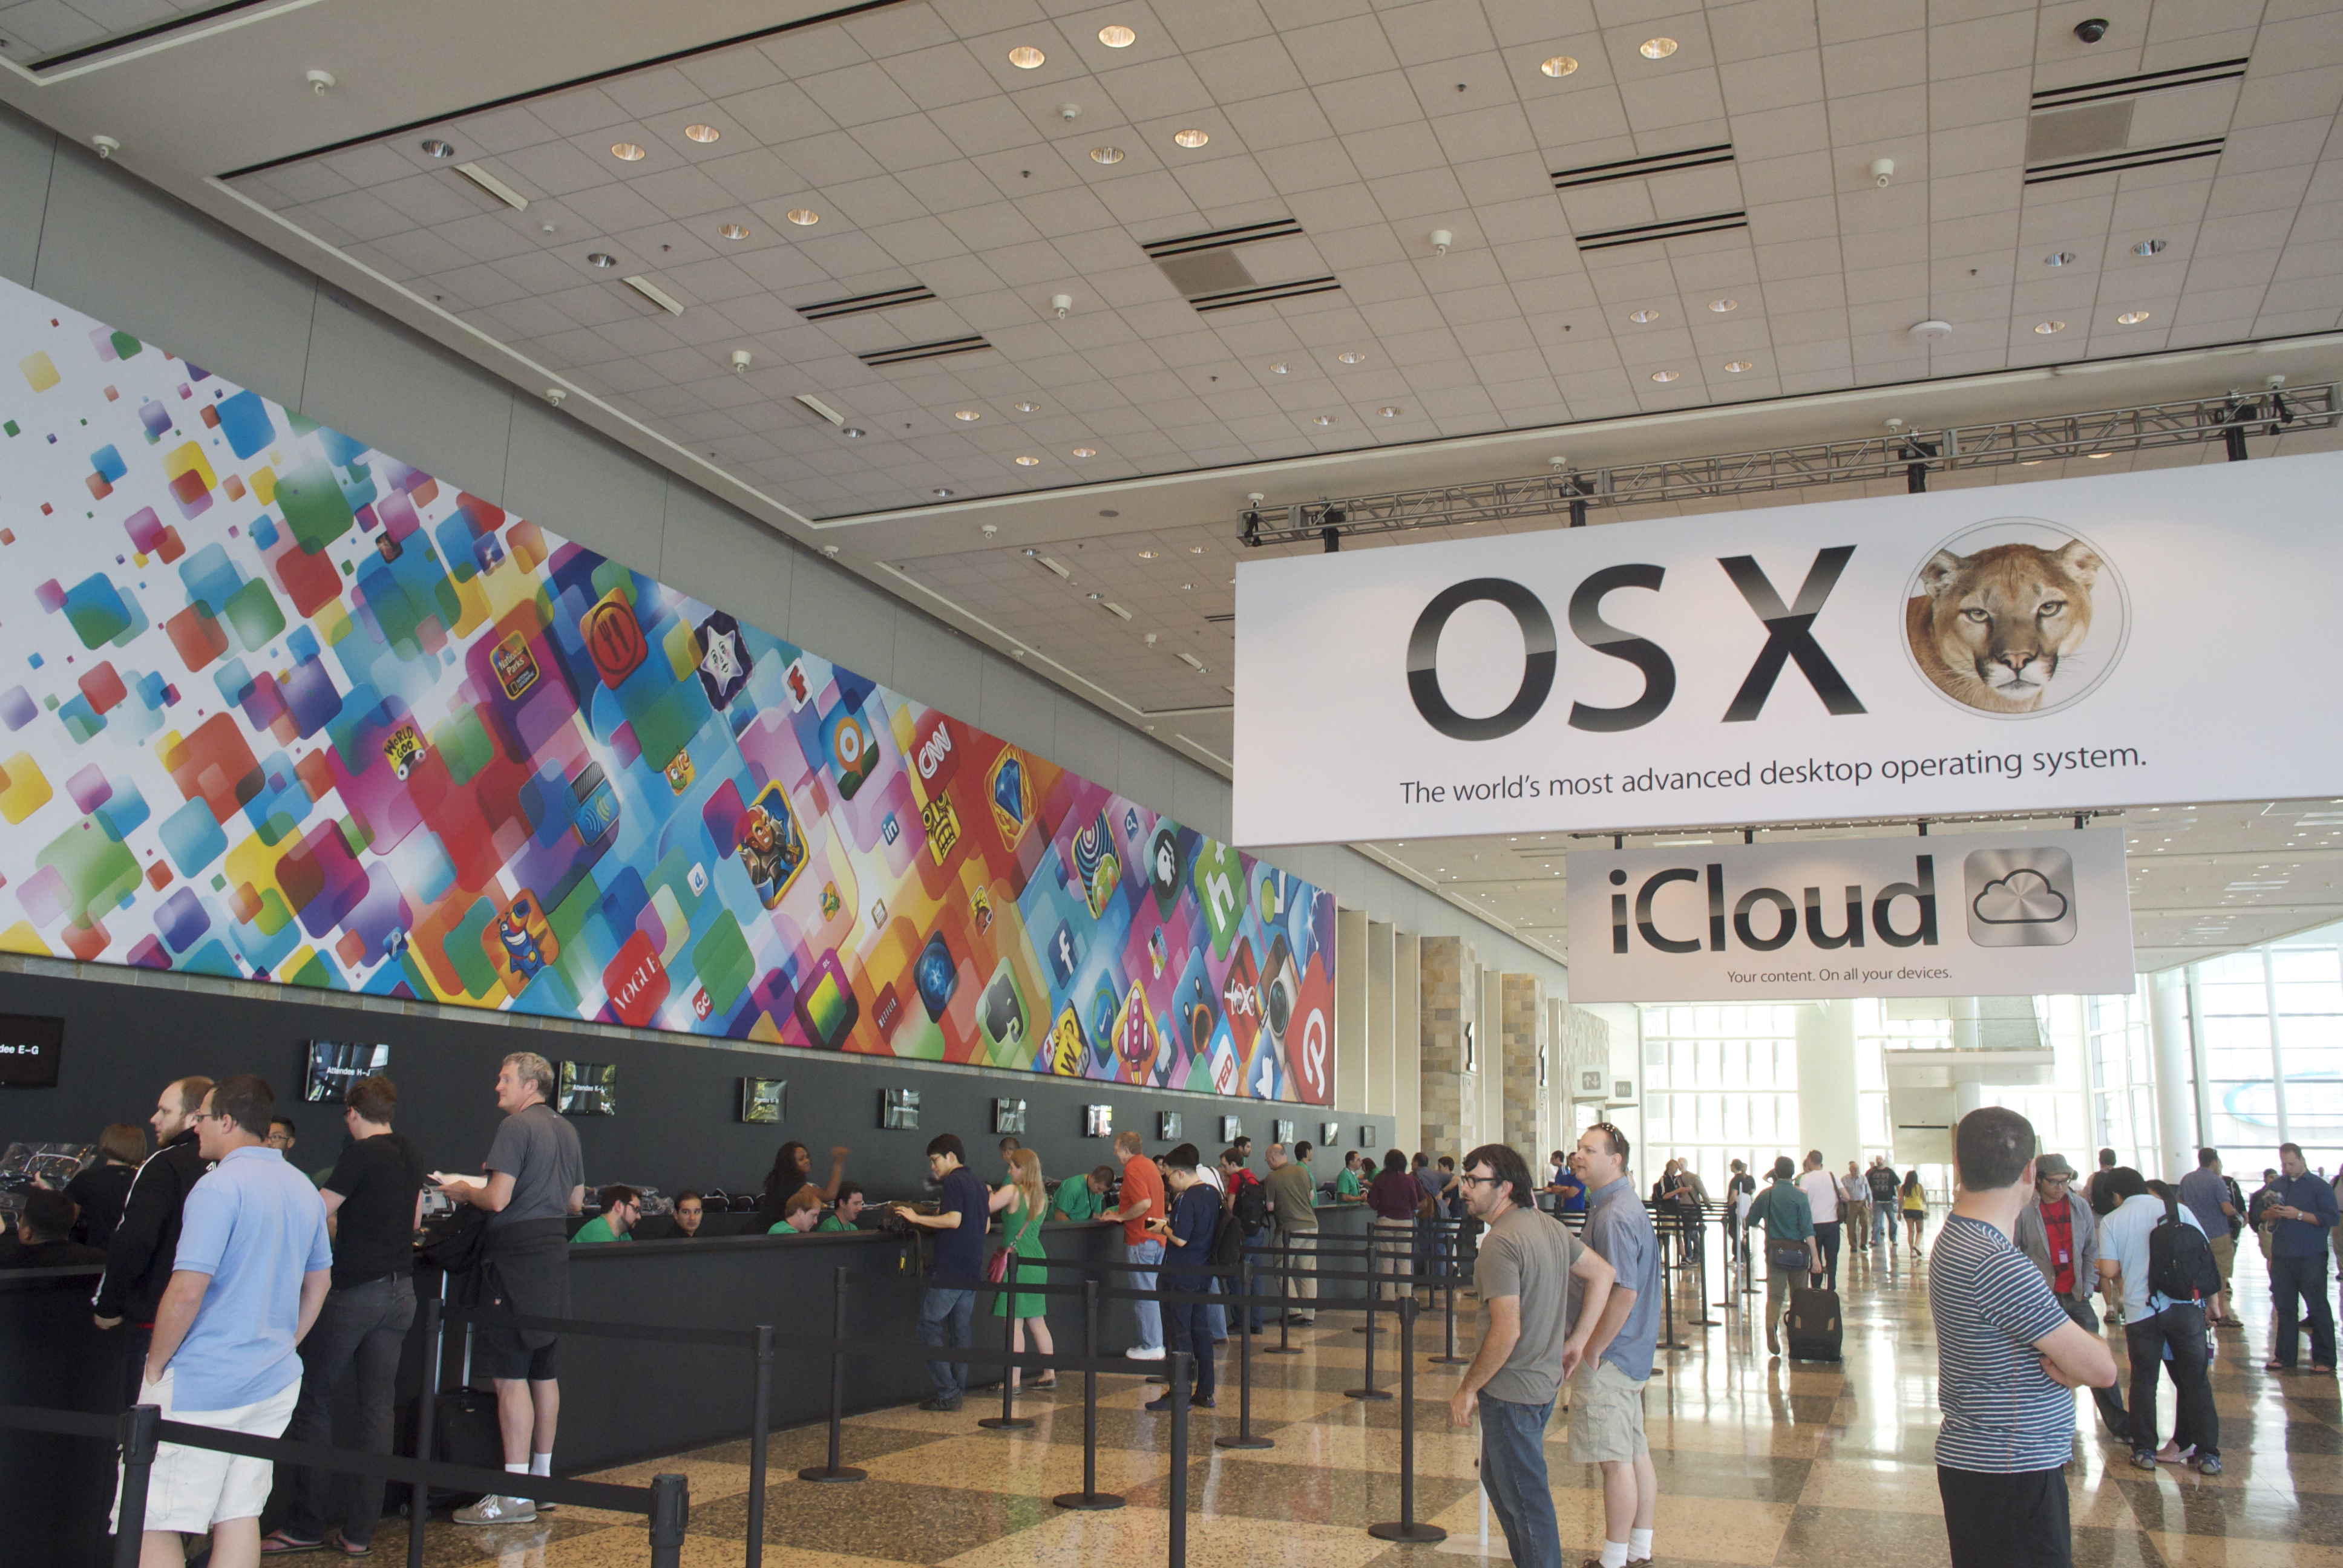
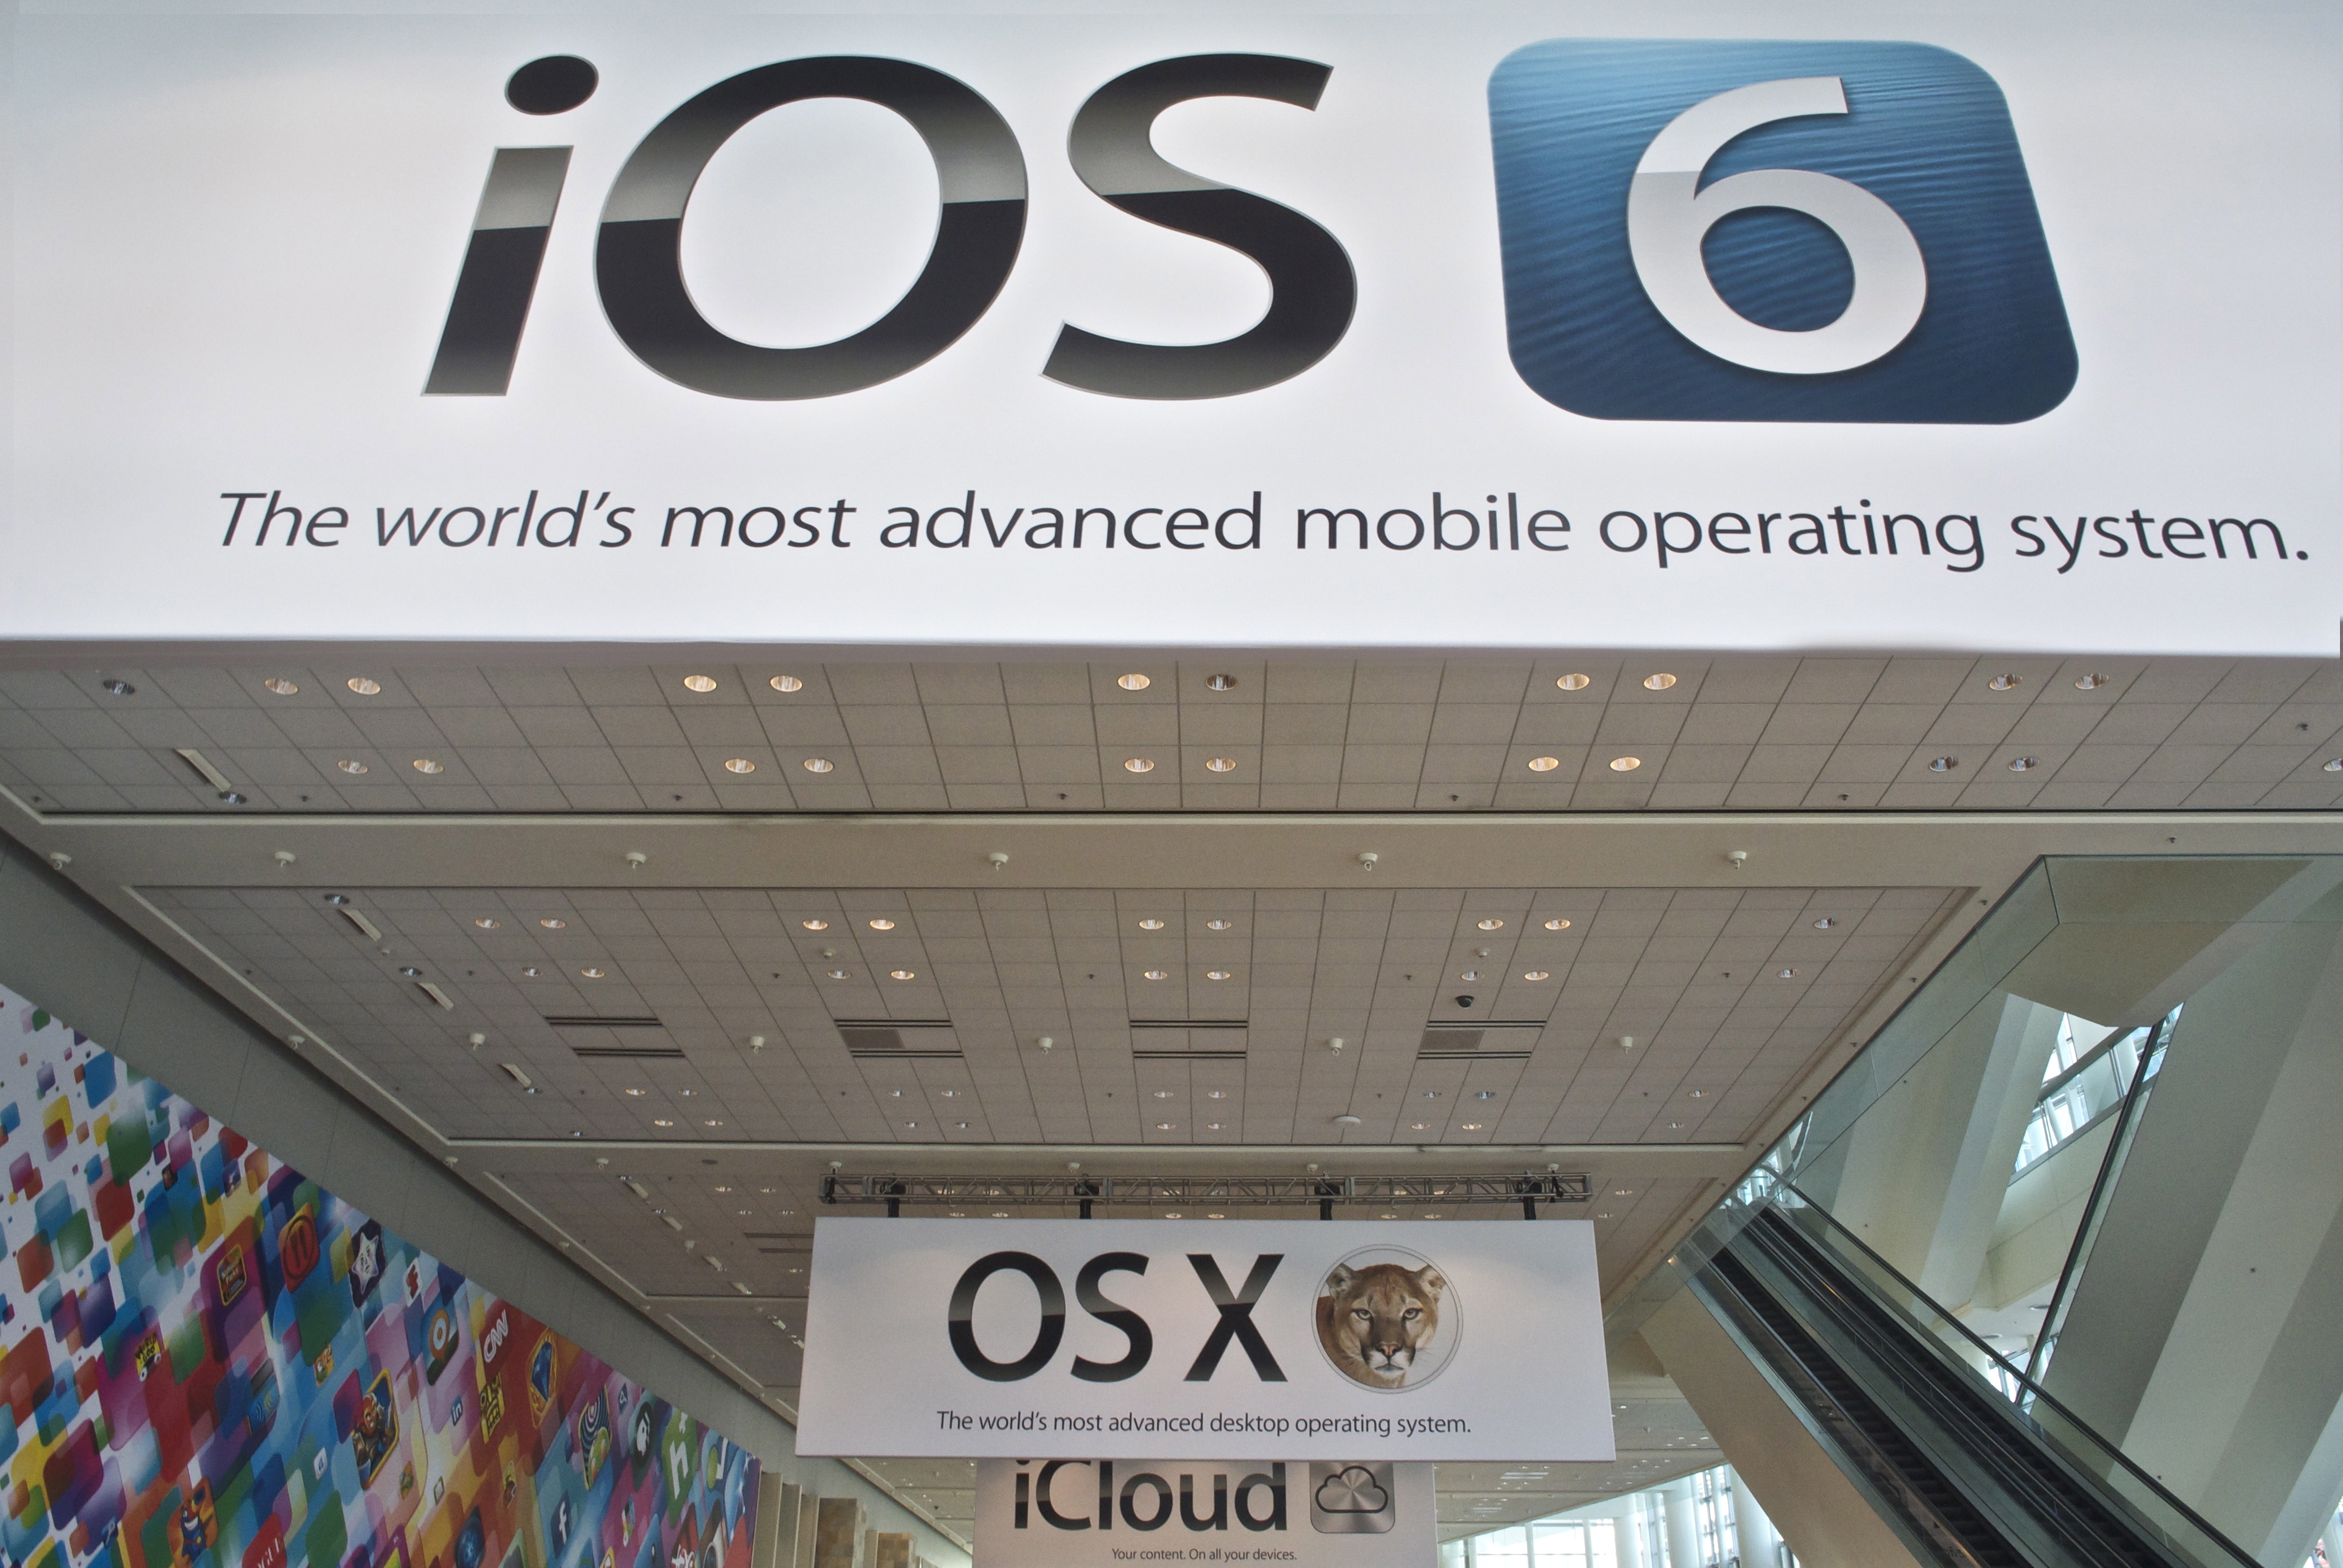
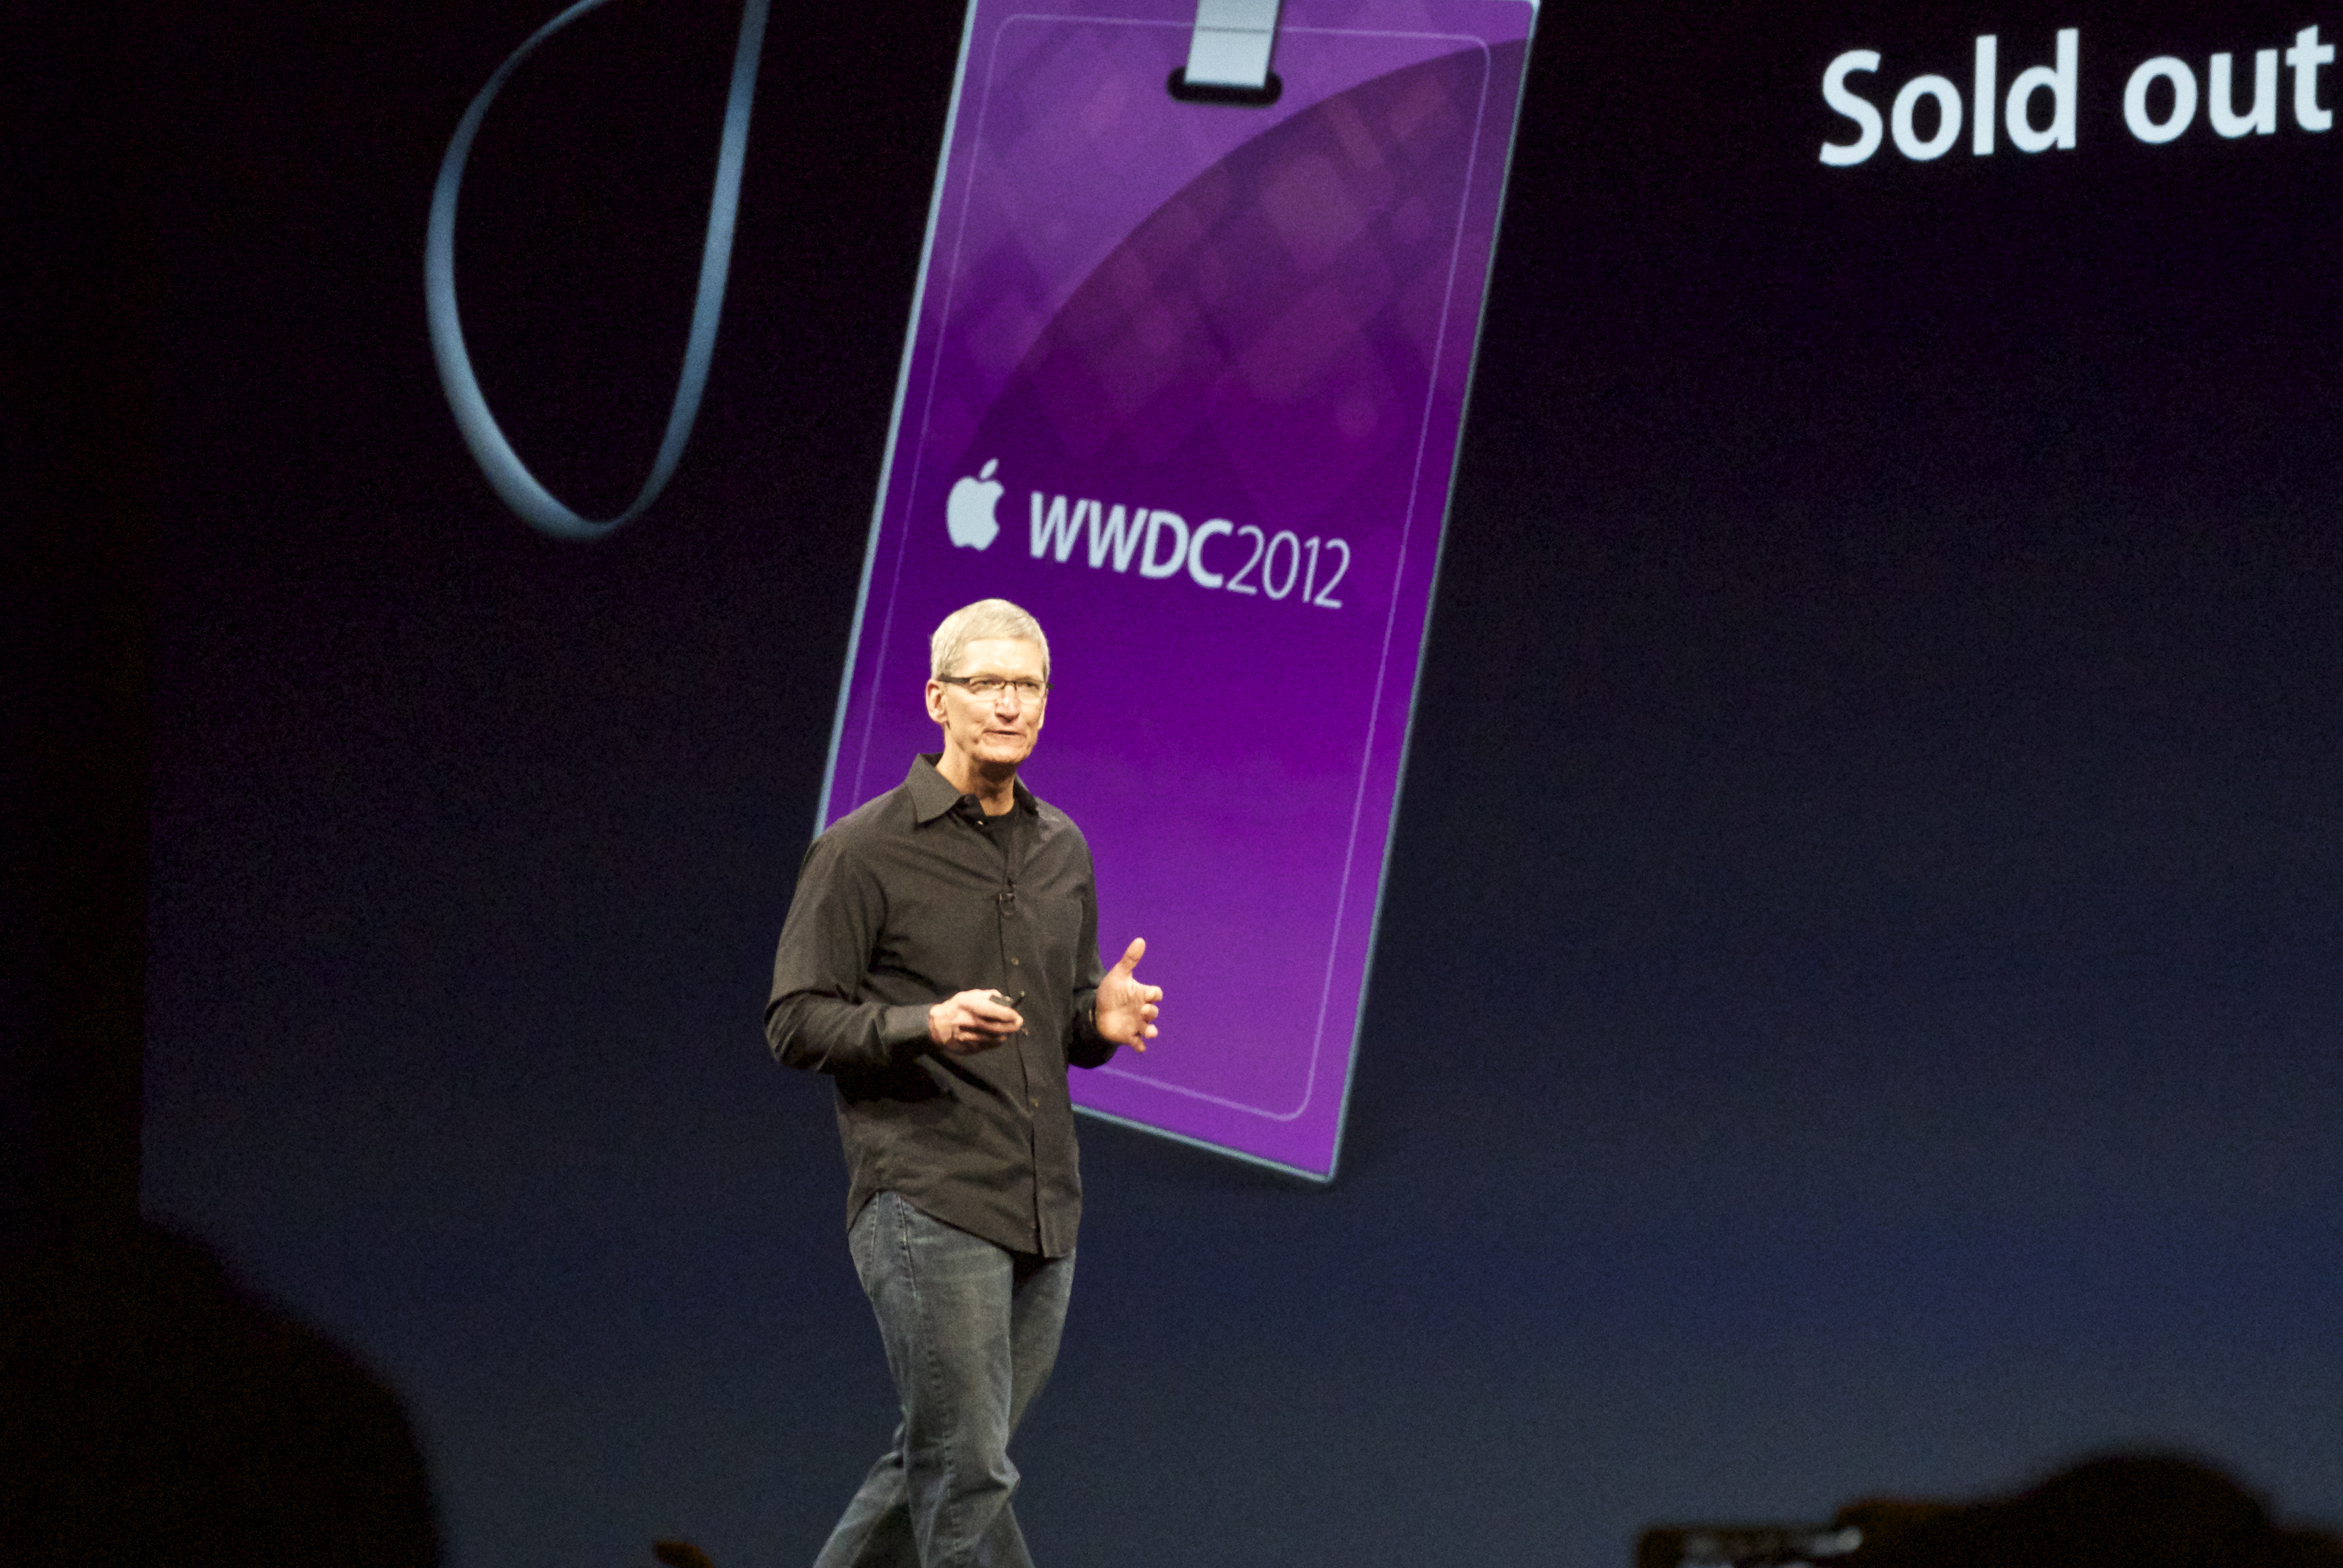
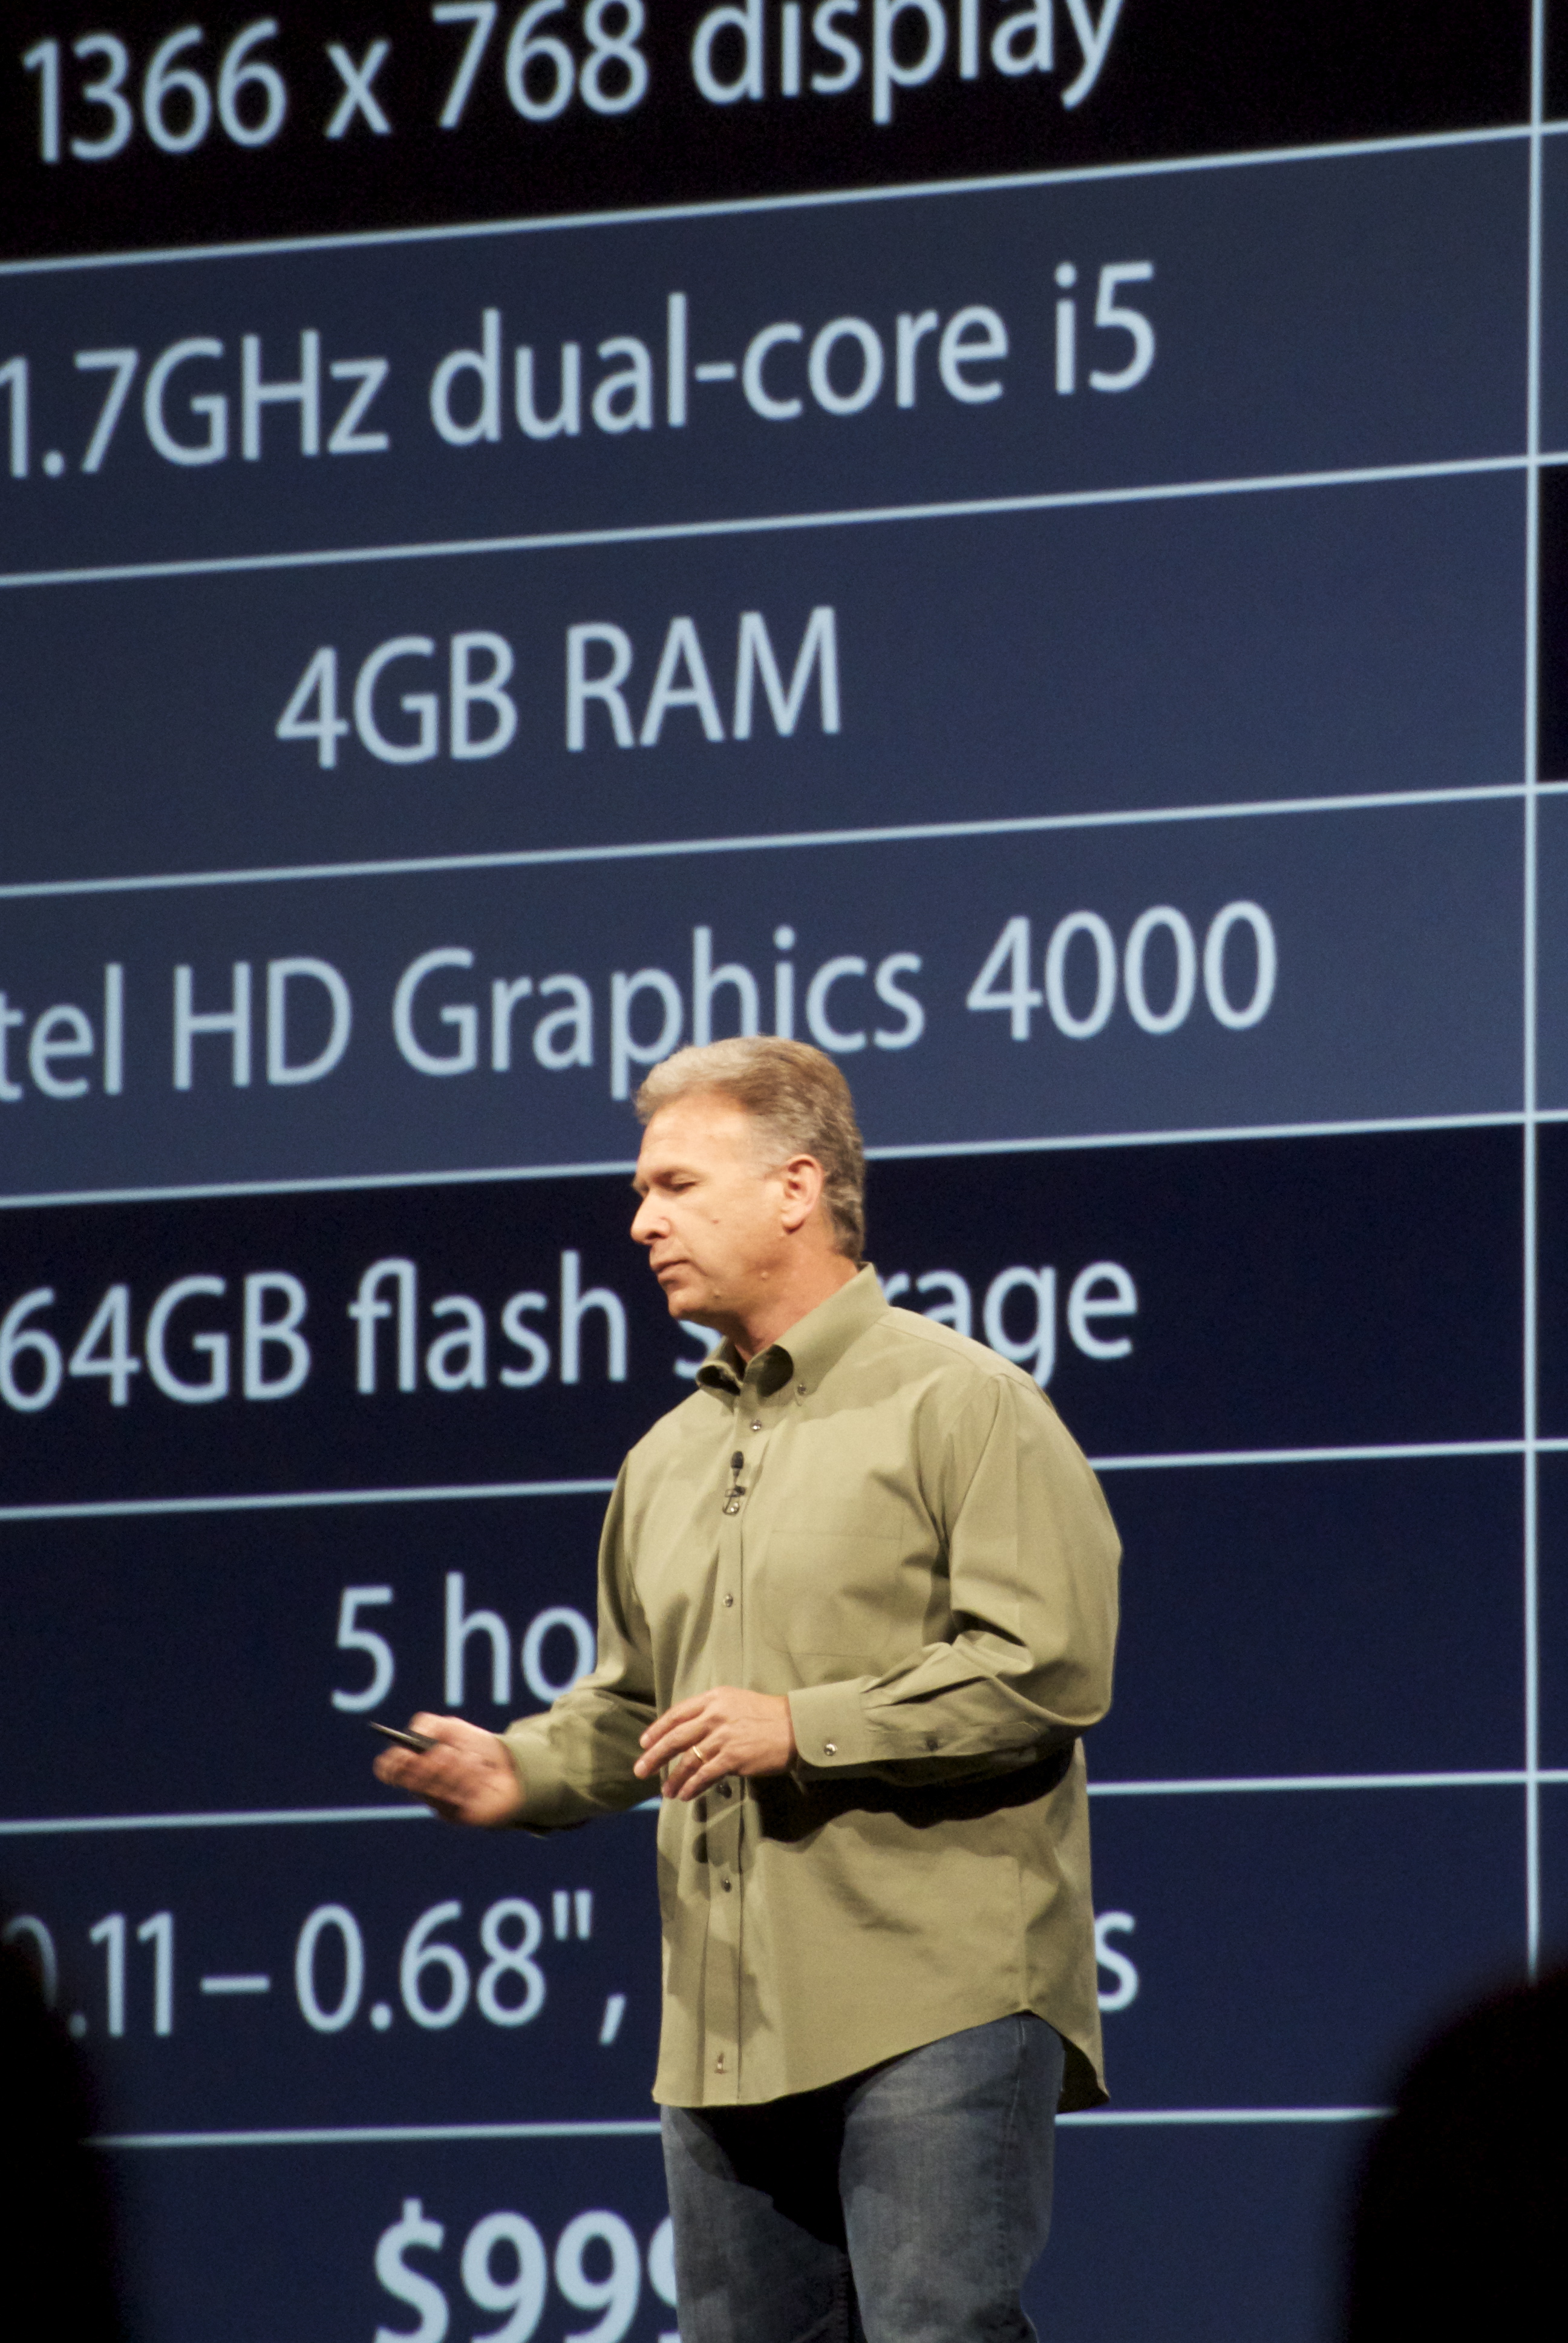
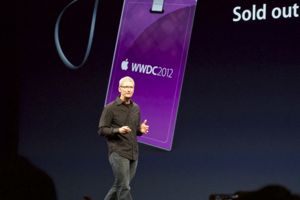
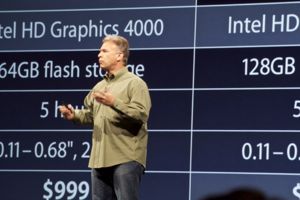
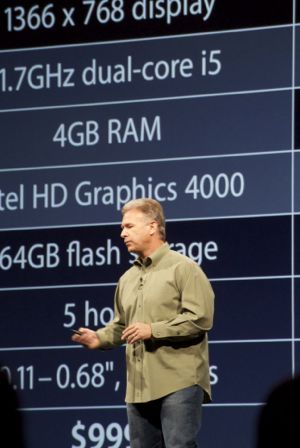
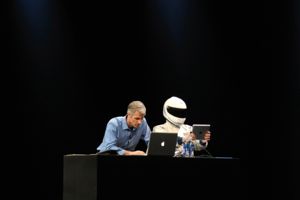
Despite the fact that there was no Apple TV Announcement, the keynote was far bigger than I expected. Simply put, I didn’t think iOS 6 and Mountain Lion would be as big as they were, and the new Macbook Pro is gorgeous.
I had my Nikon V1 and 30–110mm along, though I think next time I’ll bring along a DSLR. The light simply wasn’t good enough for the slow lens/small sensor combination.


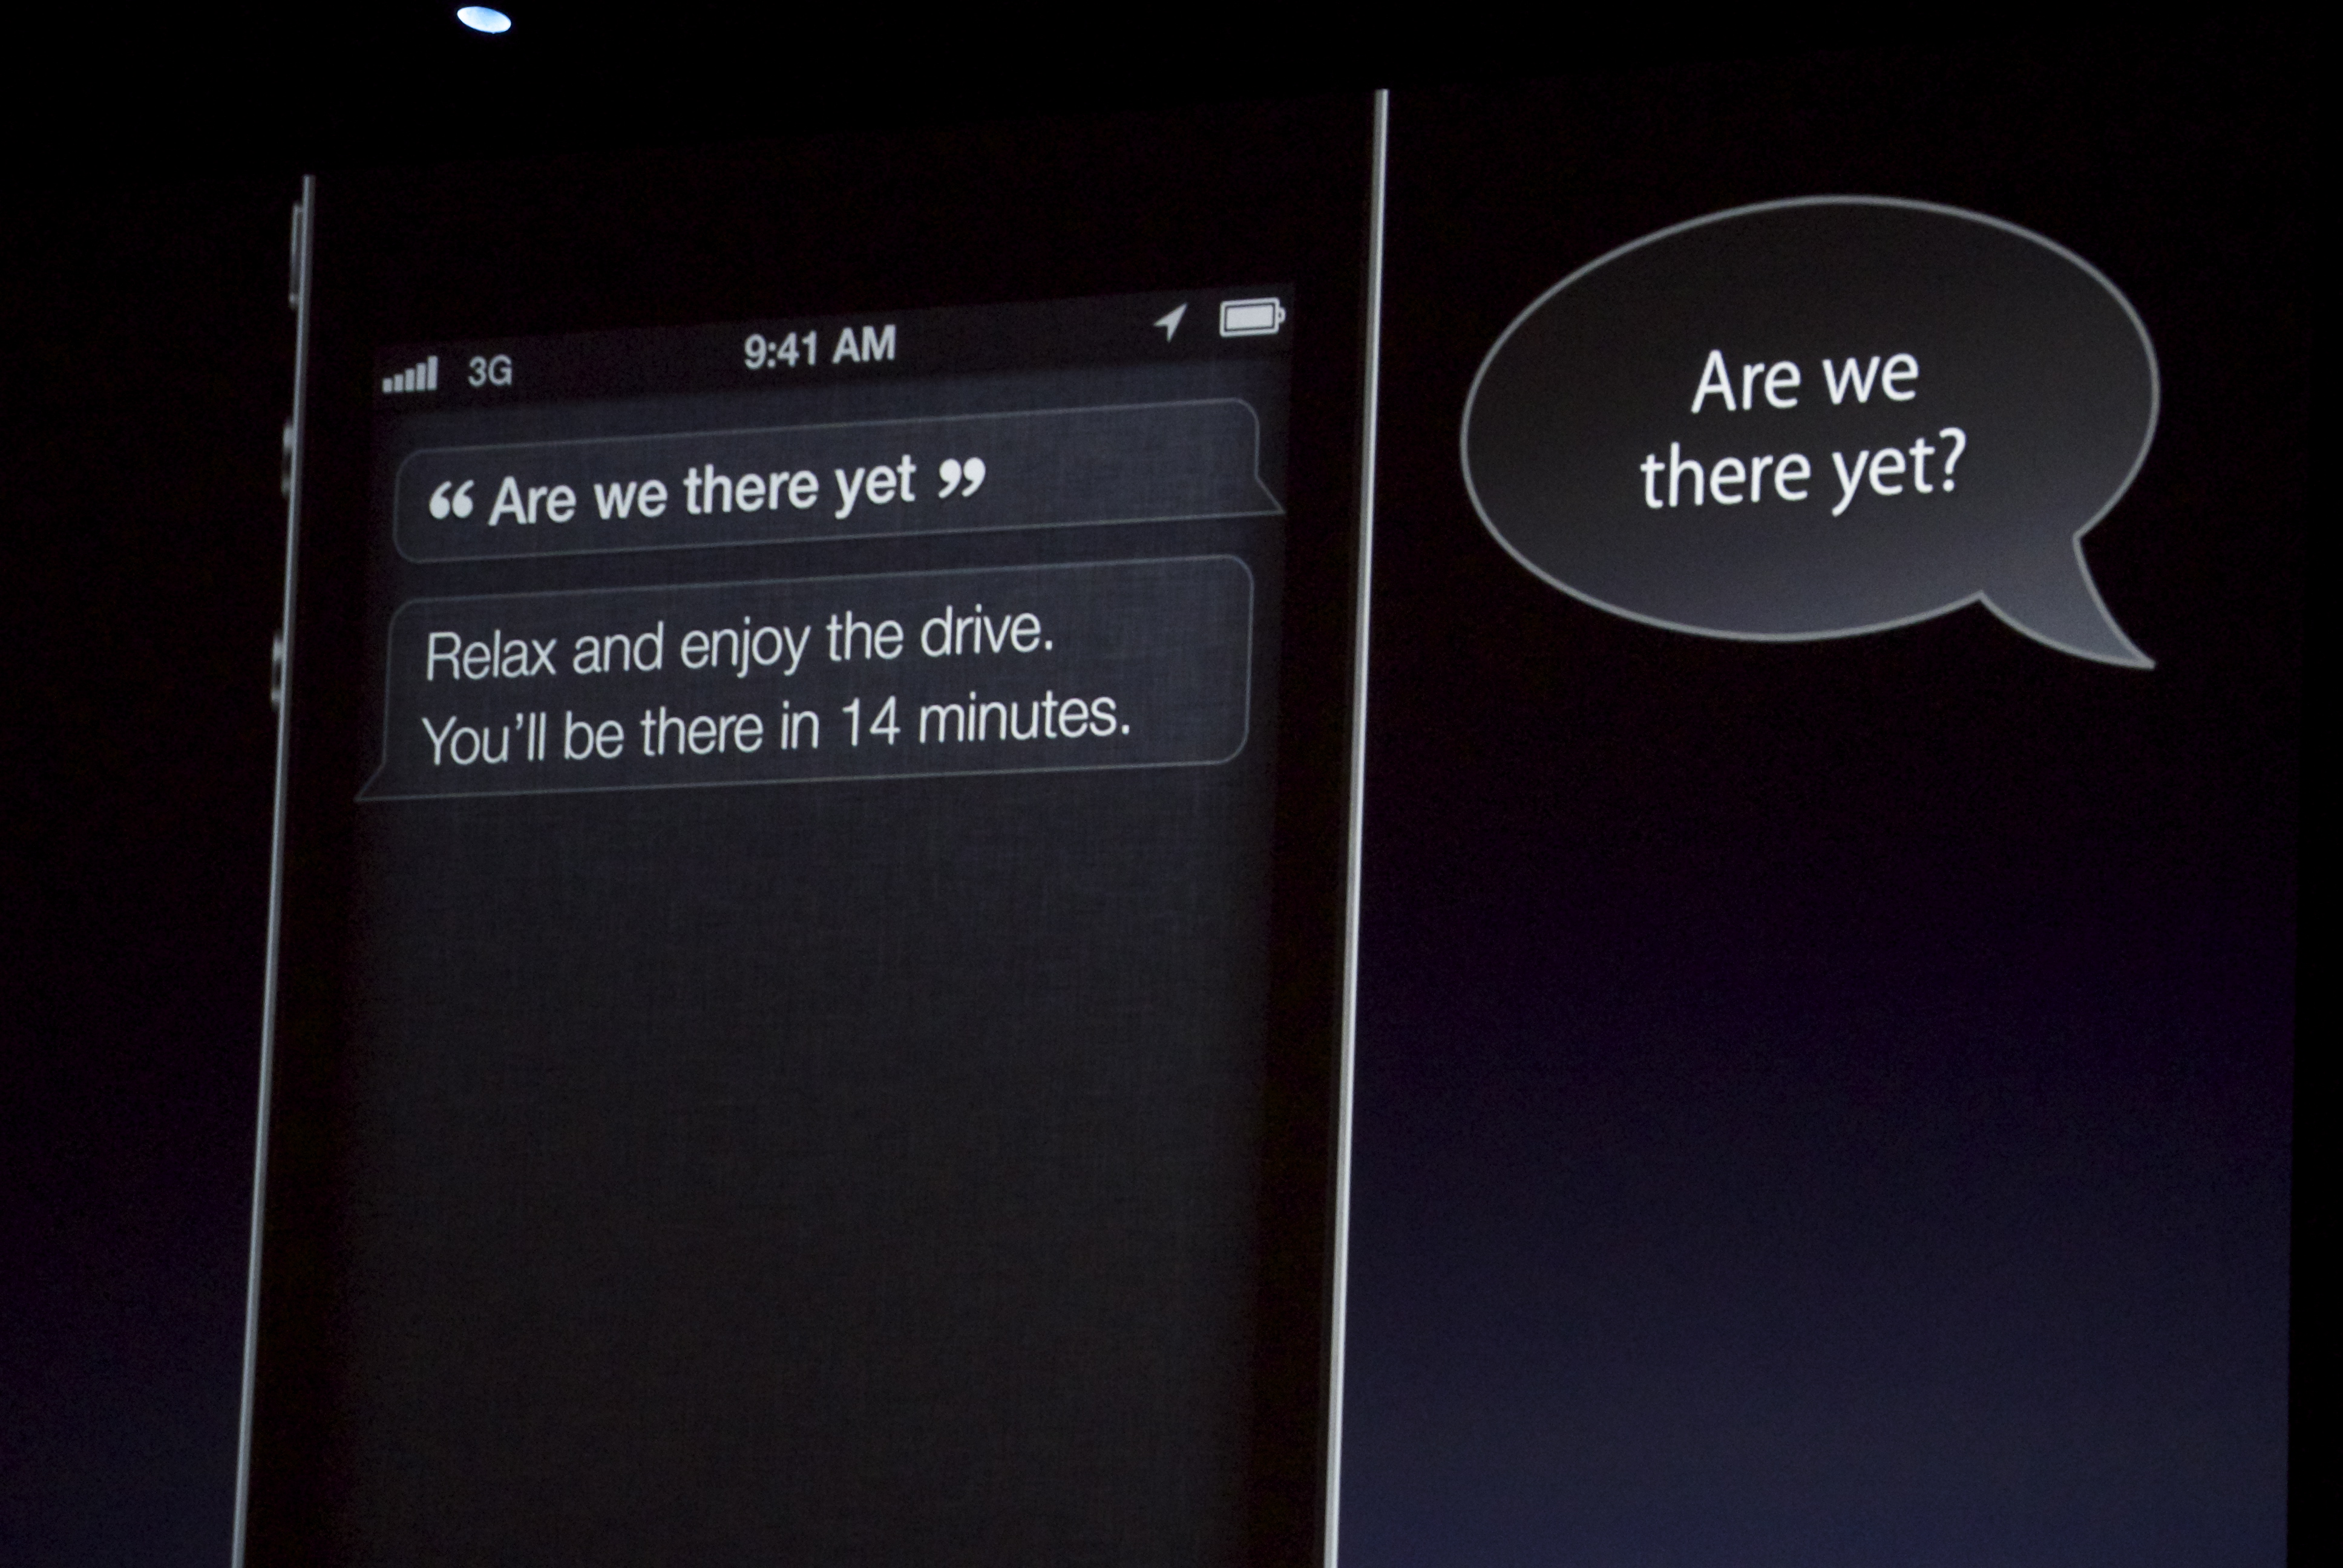
The One Thing I Want From iOS 6.
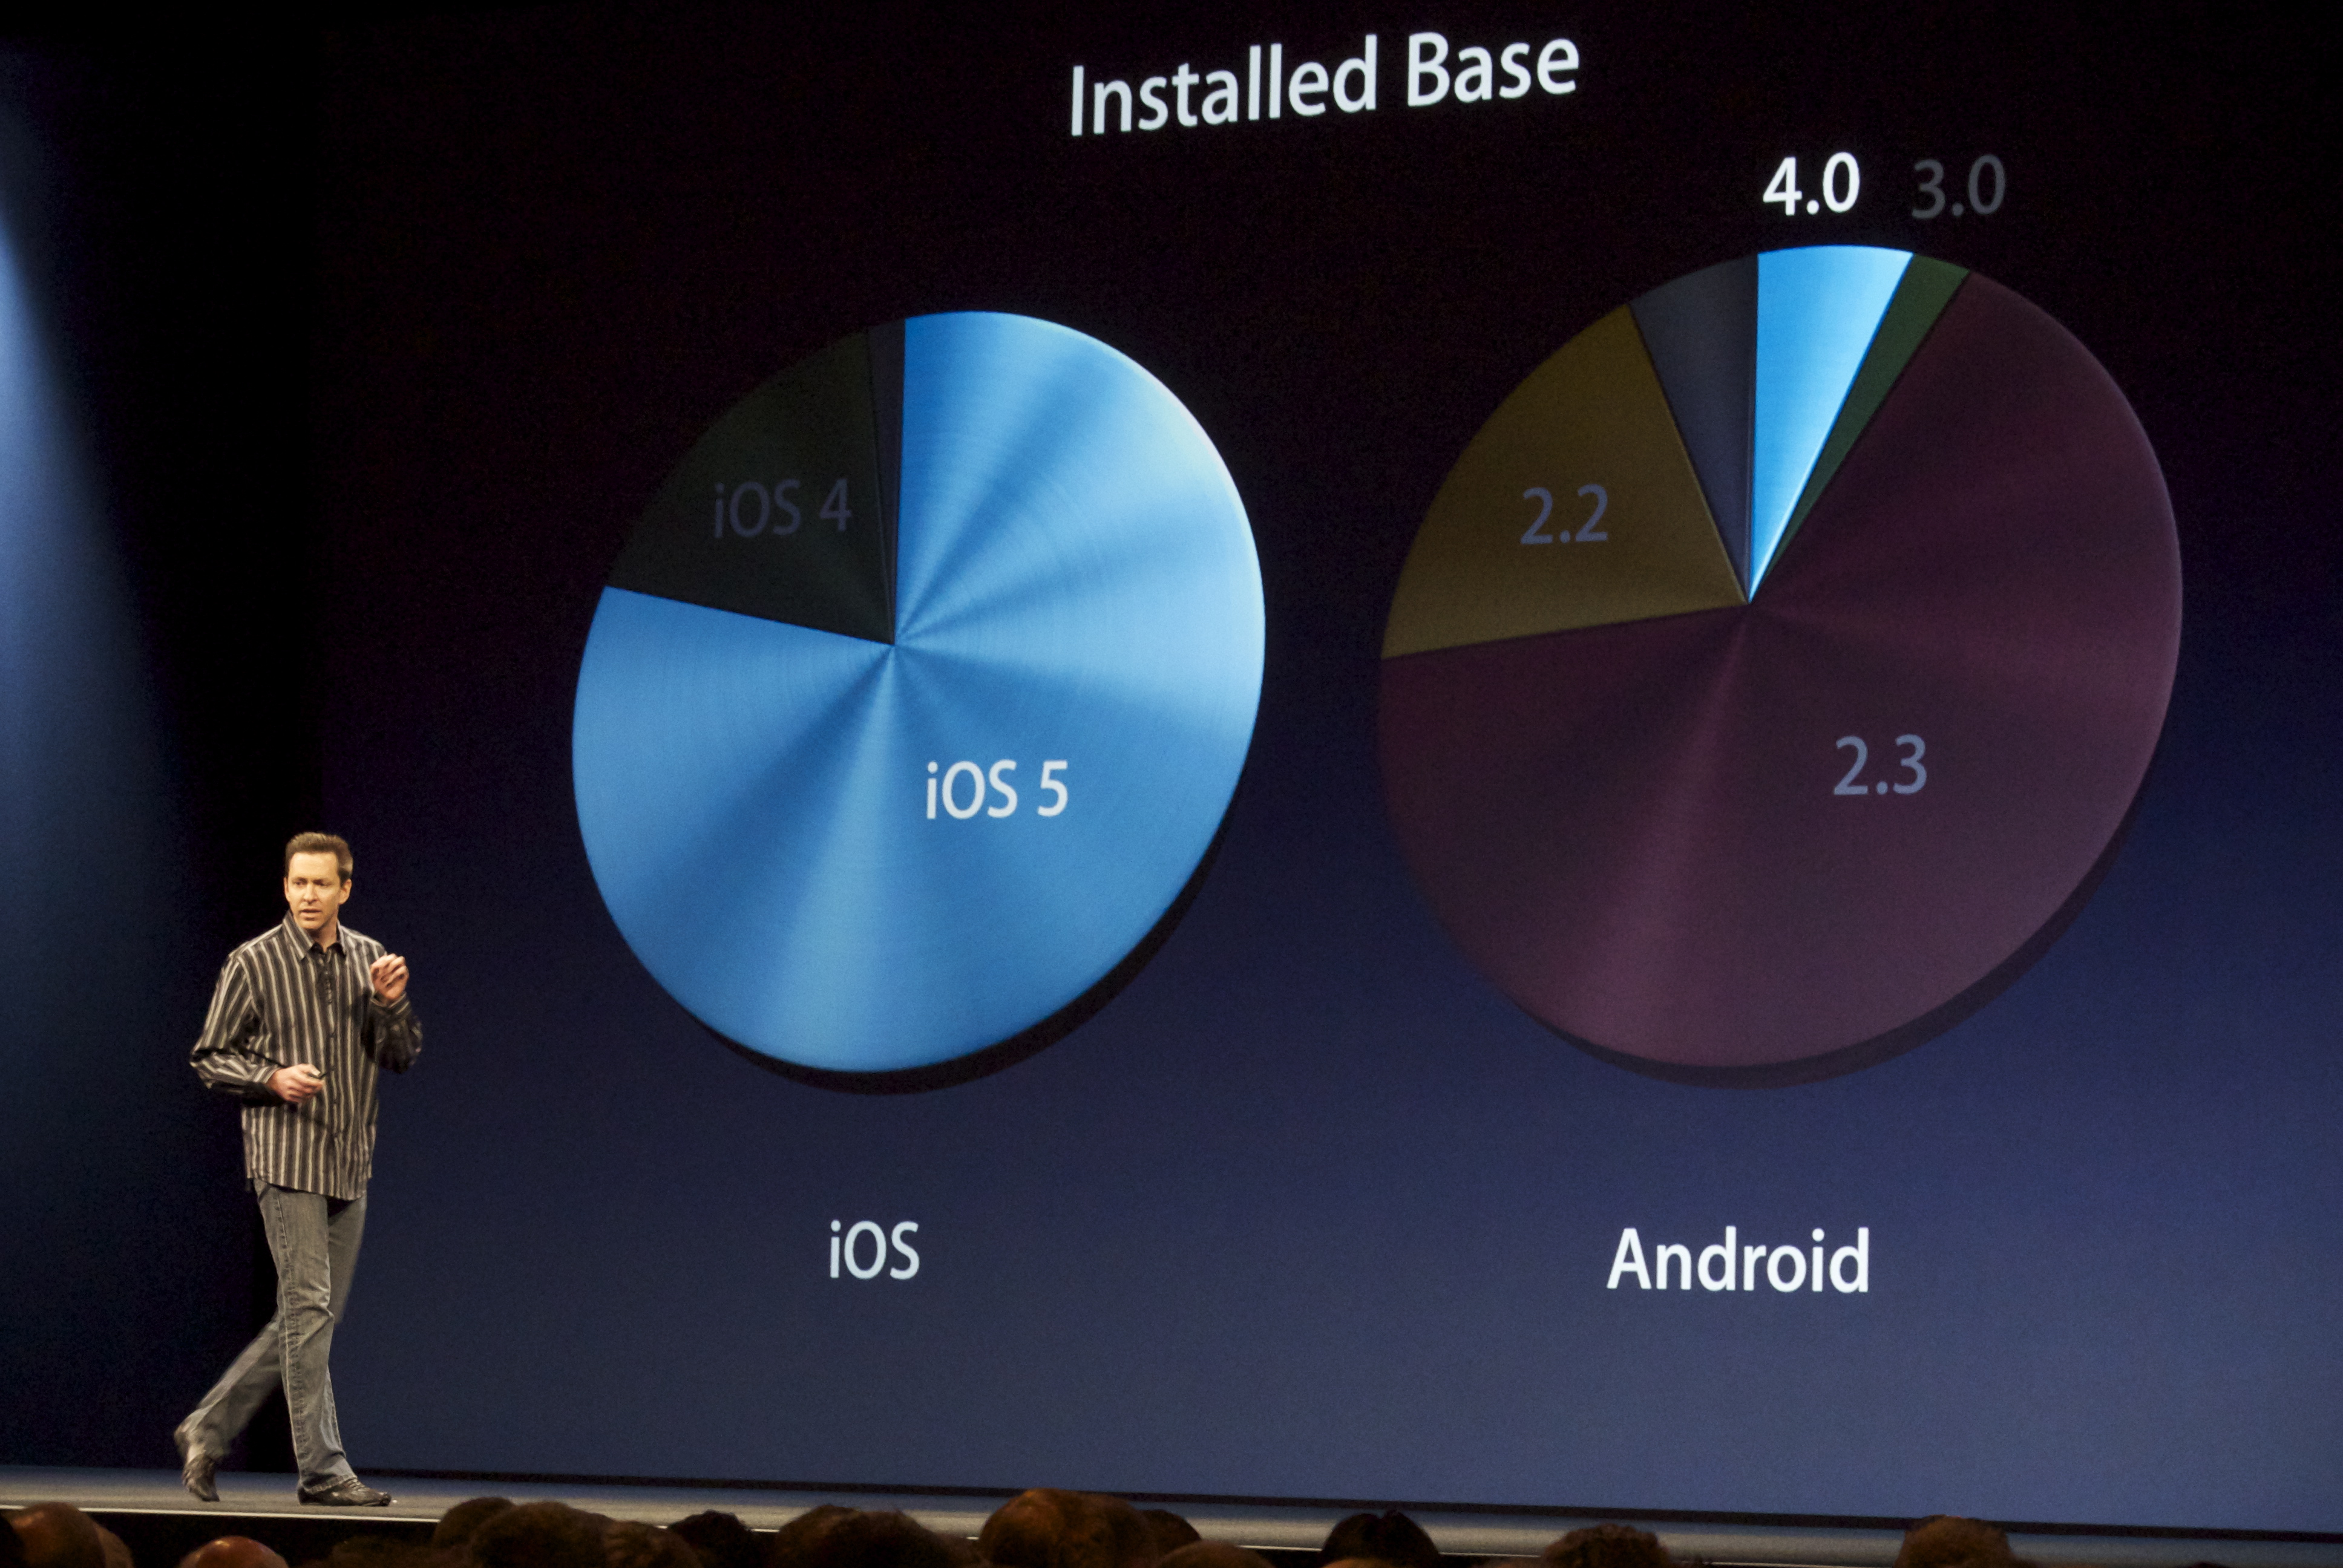
There has been a lot of talk and speculation over what Apple will announce tomorrow at the WWDC keynote, but the one thing I’ve been waiting for for the last couple years has barely been mentioned, if at all. Yes, mapping could be improved (and it will be) and yes, iOS could support better communication between apps, but there’s something else that is missing that hurts both consumers and developers.
Paid updates.
When I first released Filterstorm back in 2010, my plan was to charge money for the update that added layers to the app. Well, that came in 2011 and I didn’t end up charging. So far, the consumer has won if they’re purchasing from me. However, a number of other developers have gone the route of releasing a new app for their major update. PhotoForge 2 is a good example. In this (entirely understandable) case, existing customers lose, as they have to pay full price a second time for the app.
I want to charge $0.99 to existing customers for a major update, rather than having them pay the full $3.99 for the new functionality as if I were to release a separate app. I also want to be able to use the update screen to let customers know the new version exists rather than having to search for it on the app store.
On the other side of the coin, in app purchases would allow me to charge for new features, but this sort of nickel-and-dime charging per feature is antithetical to my ideals of simply charging a fair price for a quality product, and what I think a good user experience is.
What Apple TV Apps Could Mean
This is entirely speculation, and partially a list wish, but I do think the addition of apps to Apple TV could—by itself—be the game changer people have been expecting Apple to eventually produce.
I like TV shows, but I hate TV. It’s a common sentiment in my generation. The linear nature of preprogrammed material is contrary to what we’ve come to expect thanks to the magic of the Internet. The fact that we all pay subscriptions for packages of channels, most of which we’ll never watch, is almost insulting. An HBO app, with a paid subscription (as Apple already supports in the app store) that gives access to current HBO programming would by itself sell millions of Apple TVs.
I don’t think HBO will be there from the beginning, but I do think a number of other networks would be willing to test the waters in this way, and sports franchises already offer similar apps. An even simpler app could provide a real time stream of a network’s cable feed (though local ad sales issues might be prohibitive.) Once a critical mass of networks start offering apps, a people would cancel their cable subscriptions en masse. An à la carte revolution with no new hardware needed, just the app store. Everyone is excited to see what independent developers like me do on the Apple TV, but I’m excited about the big players.
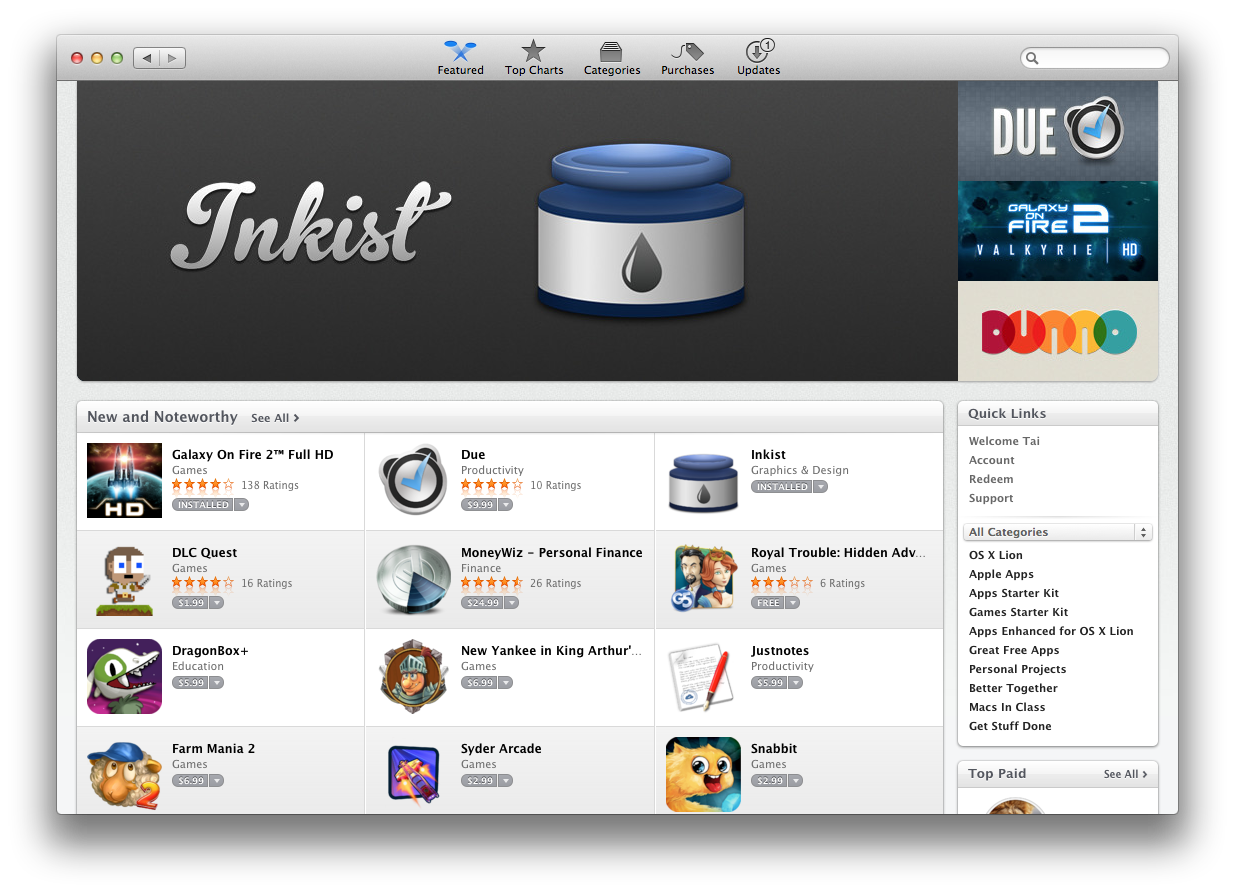
Apple gave Inkist a big banner feature! Thank you, App Store!
A bit over 2 years ago I wrote Filterstorm to be the photo editing app I wanted to use on iPad. I wrote Inkist for similar reasons. I own Photoshop, Painter, and SketchBookPro, have used all of them with my drawing tablet (a Wacom Cintiq 12WX), and to some extent I like each of them, but each also has its annoyances, and they aren’t cheap. Since fixing them isn’t something in my power, I of course went out to create my own app to satisfy my needs.

My top priority with Inkist was brushing. Brushes had to be responsive, easily configurable, and respond well to pen pressure. I spent a lot of time going back and forth between Inkist and SketchBookPro to make sure brushing compared favorably as the whole endeavor would have been useless if it didn’t. Since the back end of Inkist is shared with Filterstorm, this was the majority of the work outside of the interface.
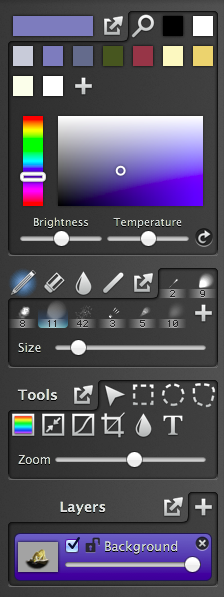
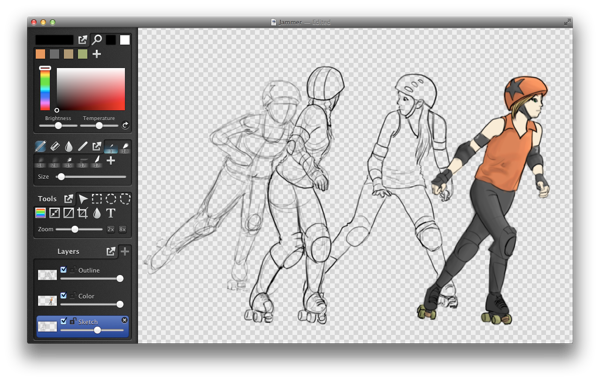
I hate it when apps have too many floating windows. I don’t mind having one, it can often be very useful, but I tend to like most tools to stay within the primary window. All of Inkist's tools are contained on the left side of the window, grouped into four palettes. Colors, Brushes, Other Tools, and Layers. Any of the palettes can be popped out into a HUD style panel, I tend to pop out either the color palette or the layers (or sometimes neither if I’m working on a flat image like the tiger image above).
I spent some time experimenting with different sizes for the buttons within the palettes trying to find the right balance between a button large enough to be easily clickable using a pen (it’s easier to hit small targets with a mouse), yet small enough so that the palettes don’t get too big when they hold lots buttons. I ended up settling on 30x30 buttons, which I believe is slightly larger than Photoshop uses, but similar to Pixelmator.

Like Photoshop but unlike SketchBookPro, the four brushing modes (brush, erase, blend, line) all share the same set of brushes to choose from, though each may have a different brush selected at any given time. I chose a different route with the blend tool than SketchBookPro, too. I believe SketchBookPro creates a blurred copy of the entire layer, then uses masking to reveal the blurring, similar to how Filterstorm works. Inkist's blend tool calculates the average color under the the brush and sets that to the brush color. The advantage of this is that if you go over something many times with the blend tool, it’ll get more blended each time, it’s also possible to use it to create less smooth blending when stylistically appropriate. That’s what I did to create the fur of the tiger in the picture above. Smooth blending can still be accomplished by using a brush with low opacity/flow.
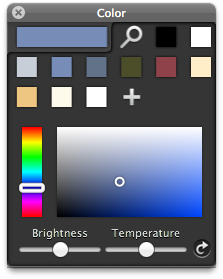
The color palette was actually the catalyst that got me to start writing Inkist . I used to have a tendency to put several shades of the same color into my color palette, switching between them in order to do shading. One day I thought “Wouldn’t it be nice if I could just keep the mid-tone in the palette and use a slider to get different shades?” A few days later I started programming. The brightness and temperature sliders will change the brightness/temp of every color in the palette including the currently selected one, and it does so non-destructively so you can just hit the reset button on the side to get back to normal. It was a simple feature, but one I find fantastically useful.
Inkist was submitted to the Mac App Store on Saturday, May 5, and will sell for $9.99. It’s a 1.0 release—there are certainly areas that need improvement, and features that need to be added—but I think anyone who enjoys digital art will enjoy it.
All content © Tai Shimizu unless otherwise indicated.