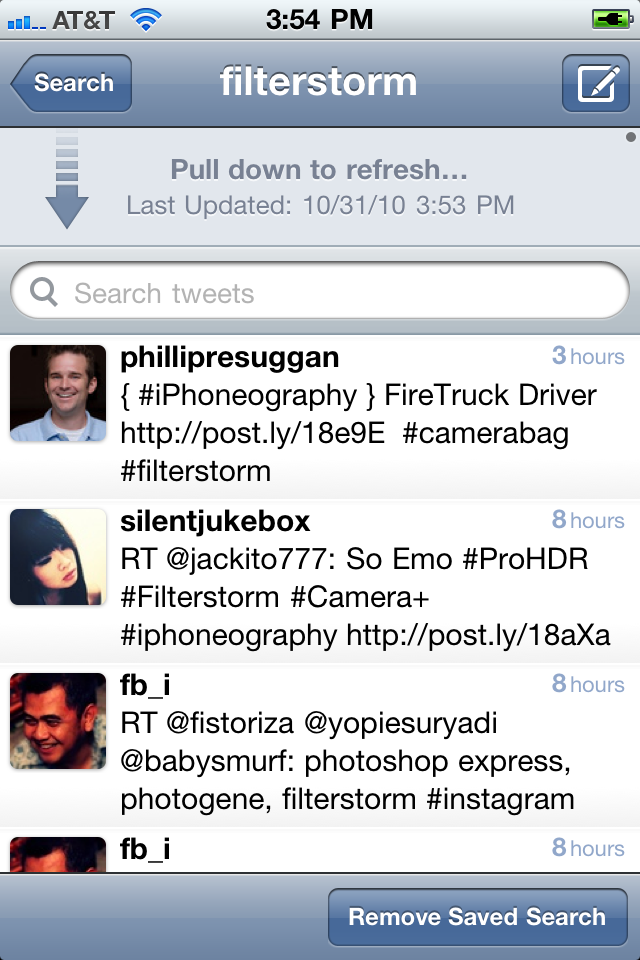
The official Twitter app’s (née Tweetie) innovative pull-to-refresh system has been a big hit, one copied by many apps. If you’re not familiar with the design, the screenshot below shows the interface. You have a list of tweets like in any twitter (or list based) app, but instead of hitting a button to refresh, you pull down the list just past where it ends and it will refresh.
Tweetie’s ‘Pull-to-Refresh’ Interface
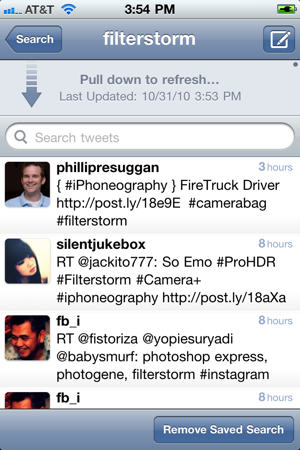
Though I’ve read of distaste for the feature from some, I’m personally a big fan and have had it on my mind while working on Filterstorm. The reason it’s so fantastically useful isn’t hard to understand; in other apps I have to move my thumb into a relatively awkward position to hit a button at the bottom or top of the screen, but using Twitter’s system, you can put your finger nearly anywhere on the screen and simply drag down a bit.
In interface design, this property is called Fitts’s law. Loosely, Fitts’s law states the closer to, and larger the target for the pointer, the faster the pointer can reach the target. Since we’re talking about accomplishing a goal — refreshing the contents of a list — I would add the complexity of the gesture as a parameter to the amount of time it takes. Tapping is easier than swiping is easier than pinching, with a number of other gestures in the spectrum. In Twitter’s case, swiping is a bit more complex of a gesture than tapping, but that’s overshadowed by the other two variables. The distance to the list of tweets is going to be very small, since the list takes nearly the entire screen, and the size is huge.
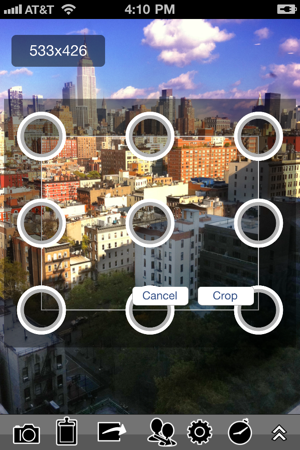
This brings us to cropping. Cropping, like nearly all of Filterstorm’s tools, was originally designed for use on iPad, and like many of Filterstorm’s tools, did not make the transition to iPhone well. It’s accomplished by moving control points along the cropping box to scale the size, or using a center point to move the box; zooming in and out does not alter the crop. The problem on iPhone were that the control points on the corners were too large, obscuring much of the image making you zoom in and zoom out to help see what you’re doing. Worse yet, the drawing method is slow on the retina display.
Old Cropping Interface
New Cropping interface
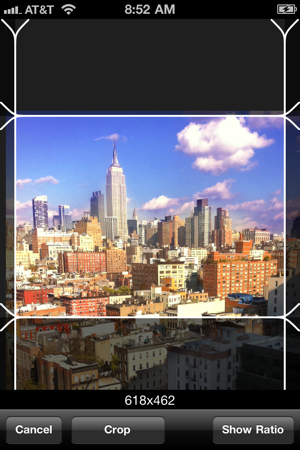
The new cropping interface is much cleaner. The lines are less obtrusive than the large box, the irrelevant toolbar no longer shows at the bottom, and it’s faster and easier to use. Almost the entire screen can be used for pinching or flicking the image to position it in the cropping rectangle.
Old Ratio Picker

The old cropping interface was a two step process, using the interface above, you choose the cropping ratio and whether or not you want to be locked into that cropping ratio, then you crop.
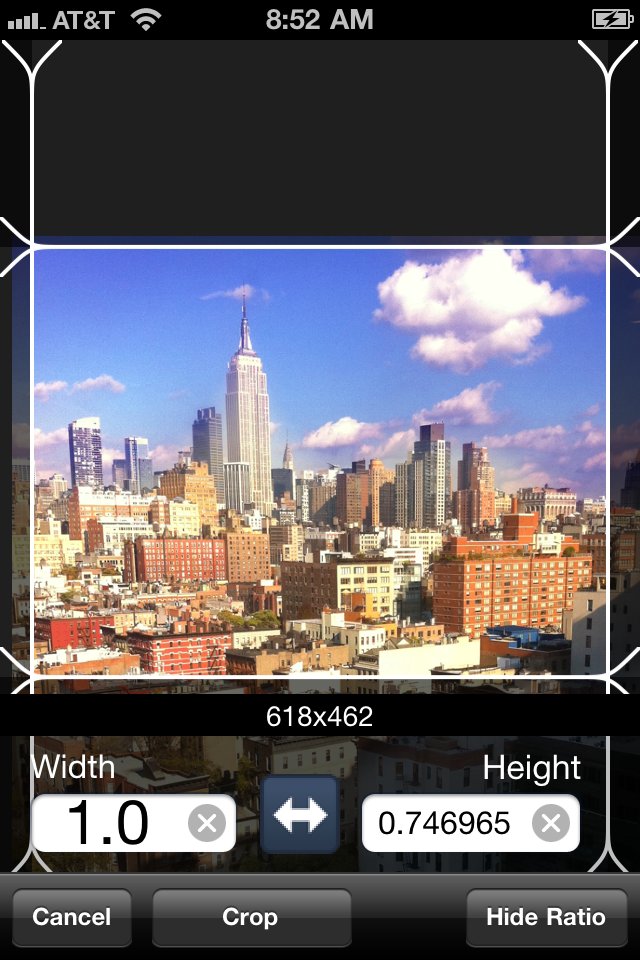
New Ratio Picker

The new interface never asks us this first step unless we want it to. Tapping the show ratio button will at any time bring up the cropping ratio boxes (defaulted to the image’s original ratio), and then you can swap the values or put in your own and the cropping lines will move to match.
Now that I have moved to working on Filterstorm full time, I’m going to be spending more time cleaning up existing features to make them better. The new cropping interface will be out when Filterstorm 2.6 is released along with new features including borders and double exposures.
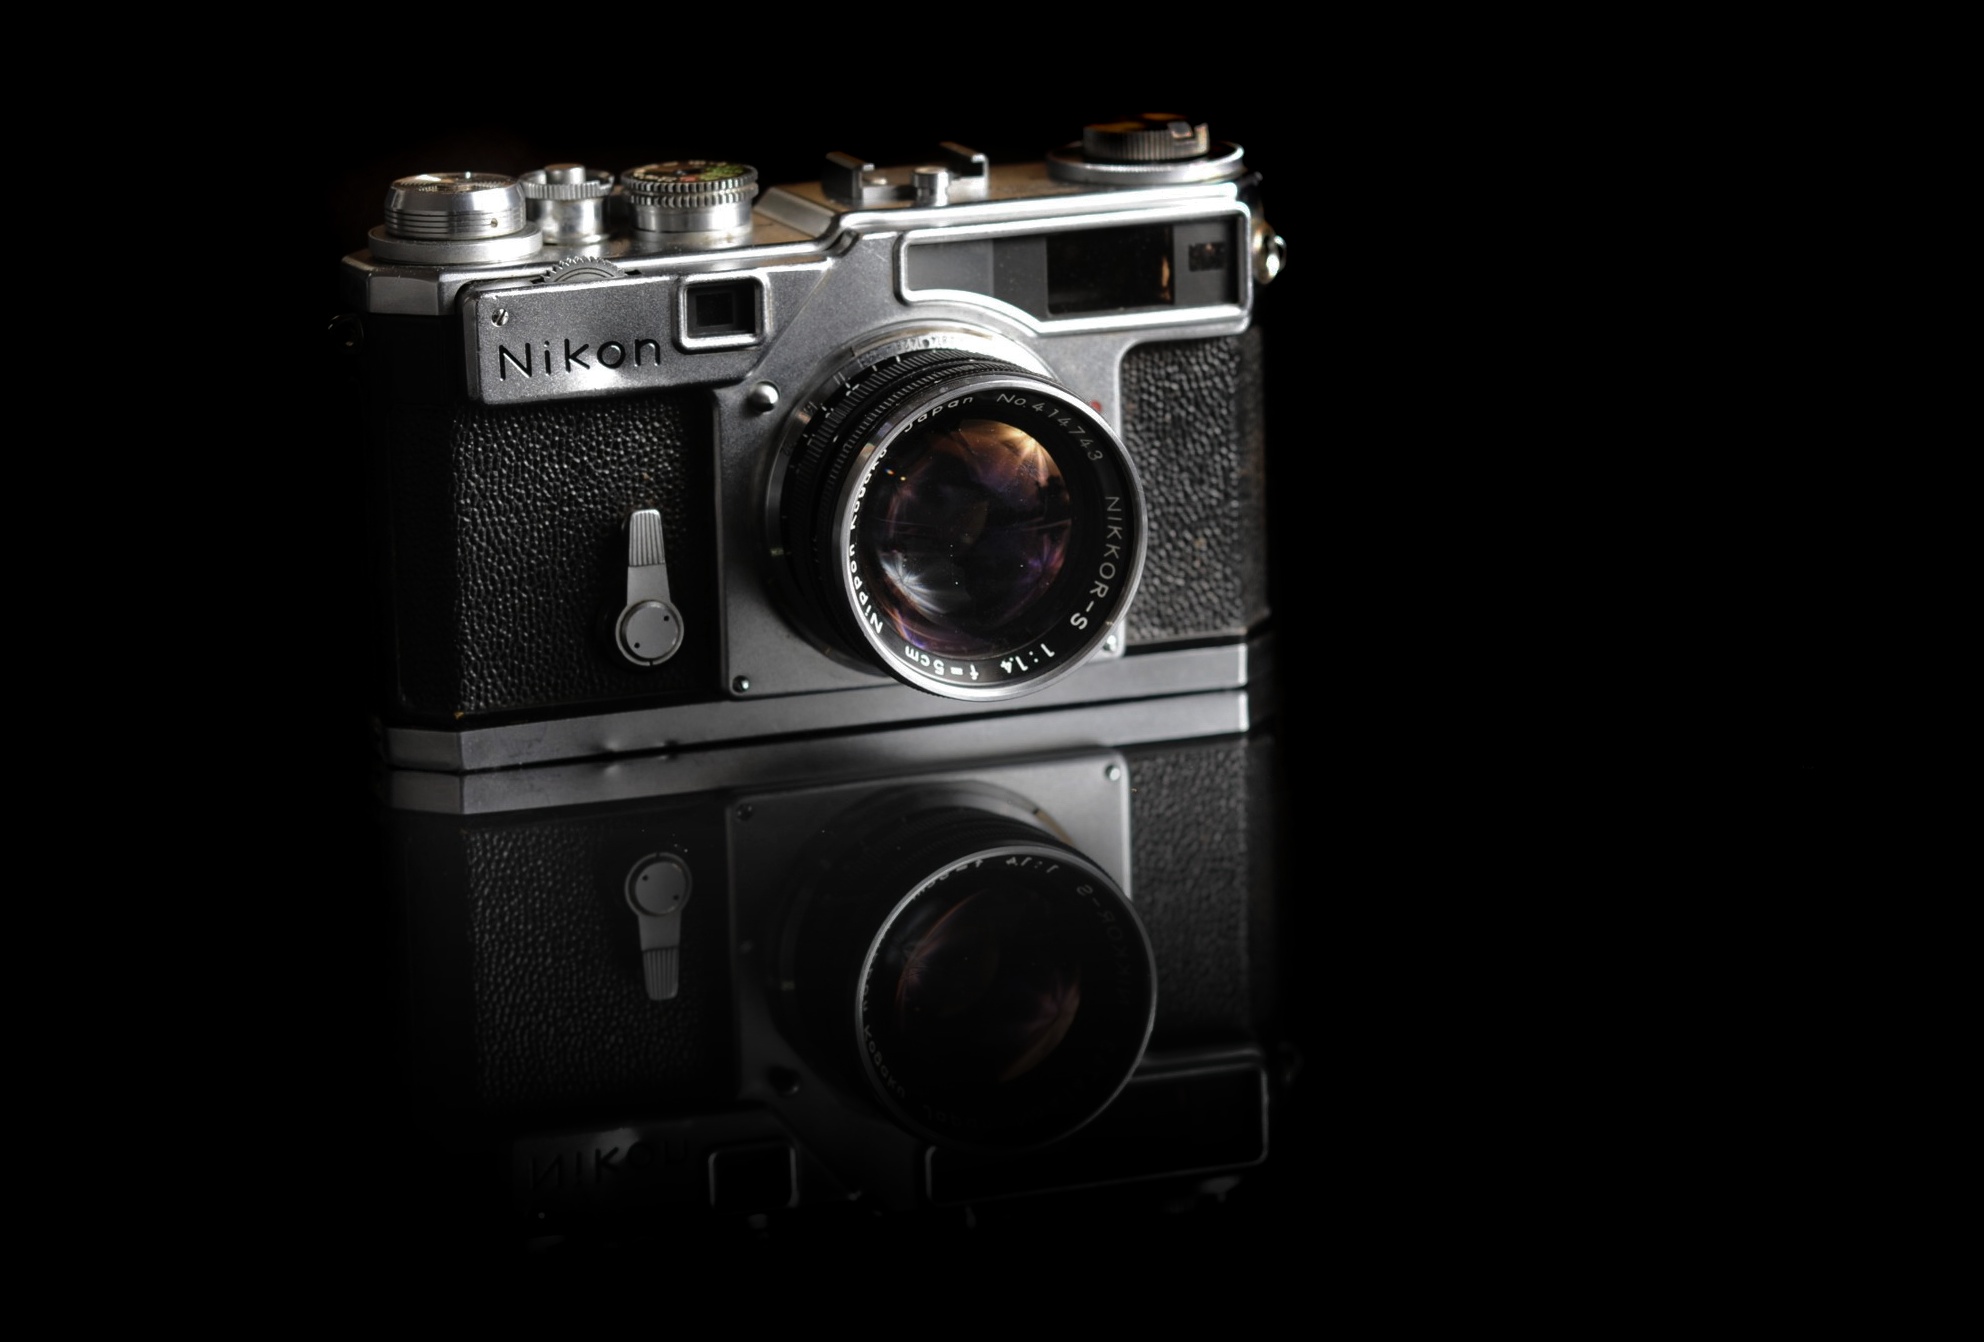
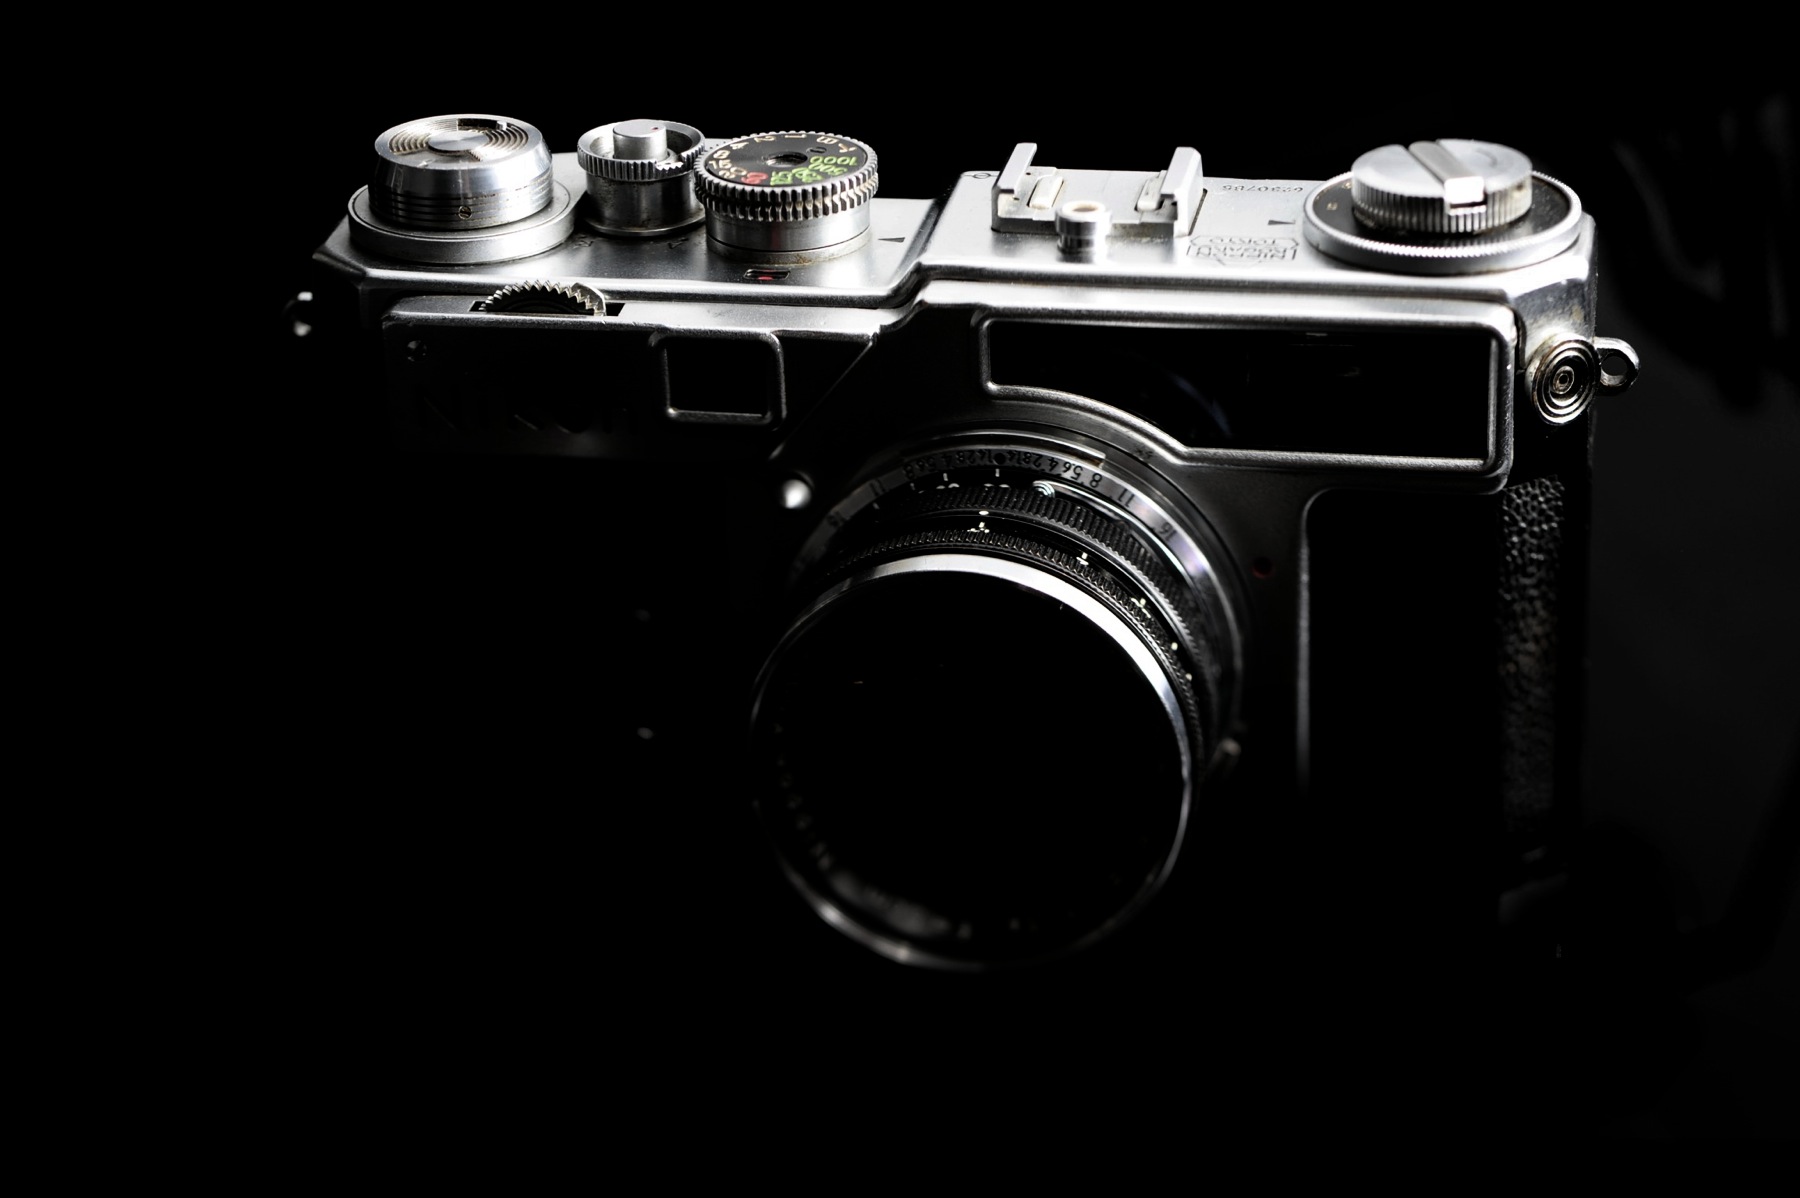
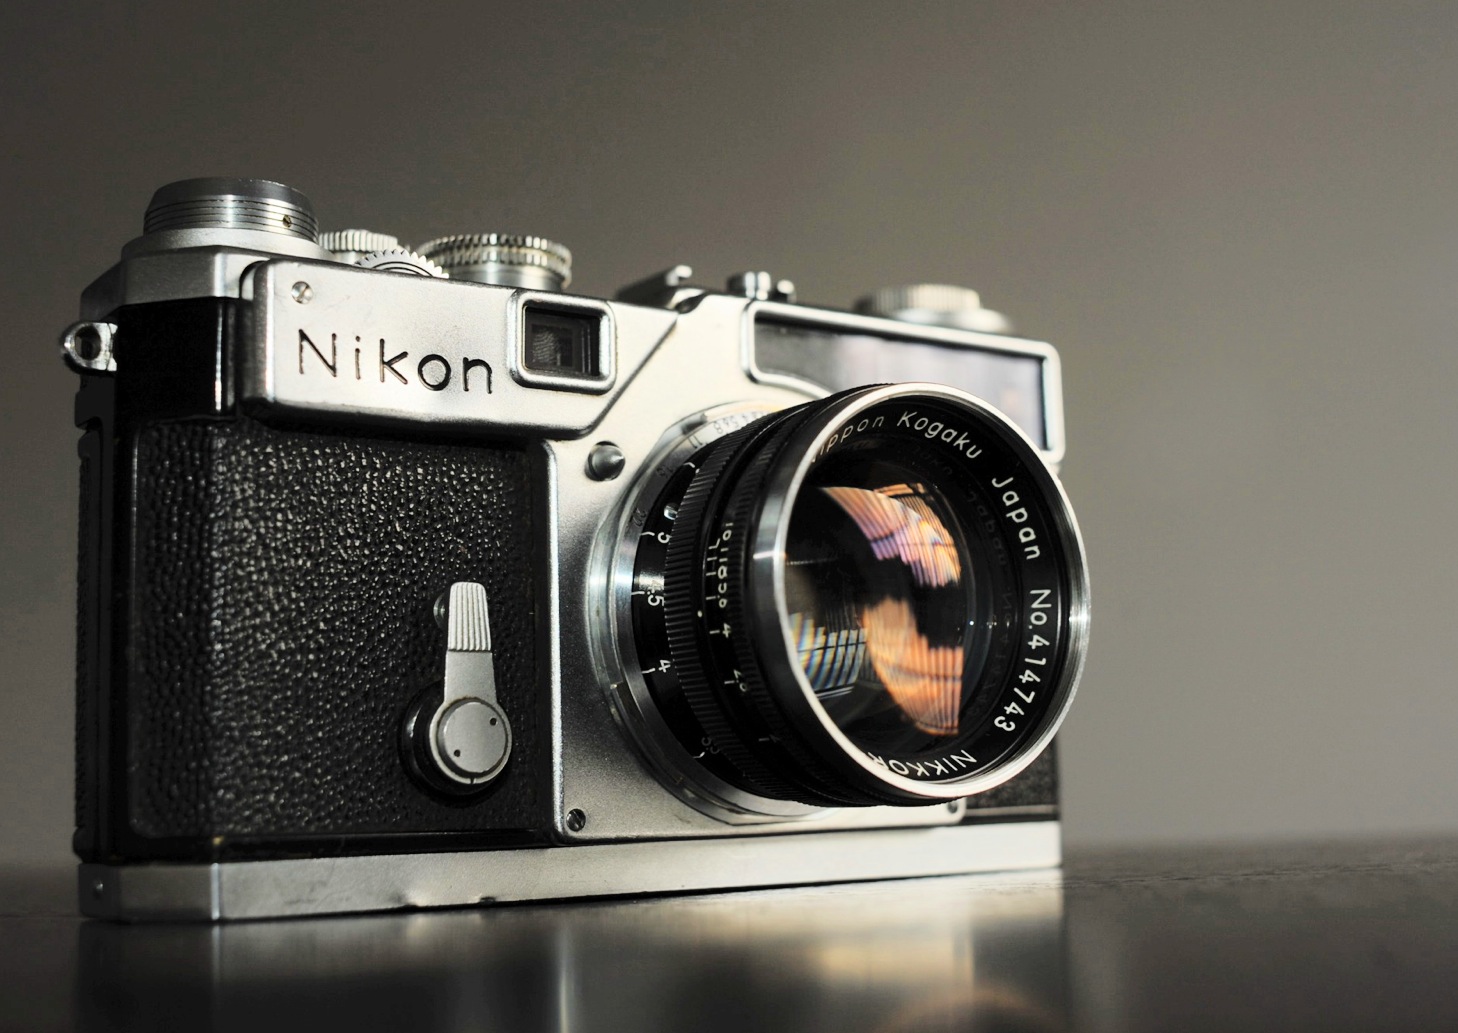
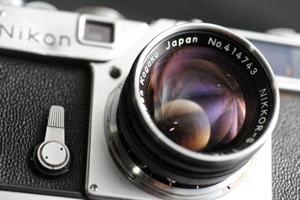
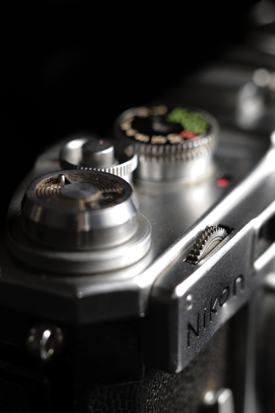
Back before the Nikon F changed everything and photographers adopted the SLR as the camera of choice, rangefinders dominated the world. In the late 1950s, Nikon set its sights on the top of the market — the Leica M3 — and created the SP which would go on to become the basis of the Nikon F.

The story of the SP as it relates to me is much less grandiose. I’m too young for it to be a purchase for nostalgia sake, and I have no desire to be a camera collector; my relationship with cameras is that I use them to take pictures. Now, I’m not saying that I’m abandoning my D700 for an SP, but I’ve not really shot with rangefinders before and I want to see what all the fuss is about. I could have gotten something much cheaper, but who could deny the allure of what may be the best looking camera ever?
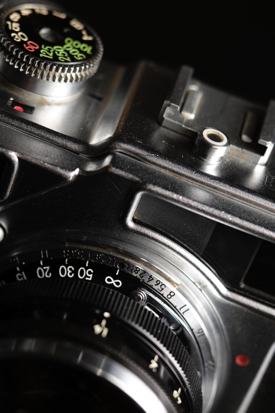
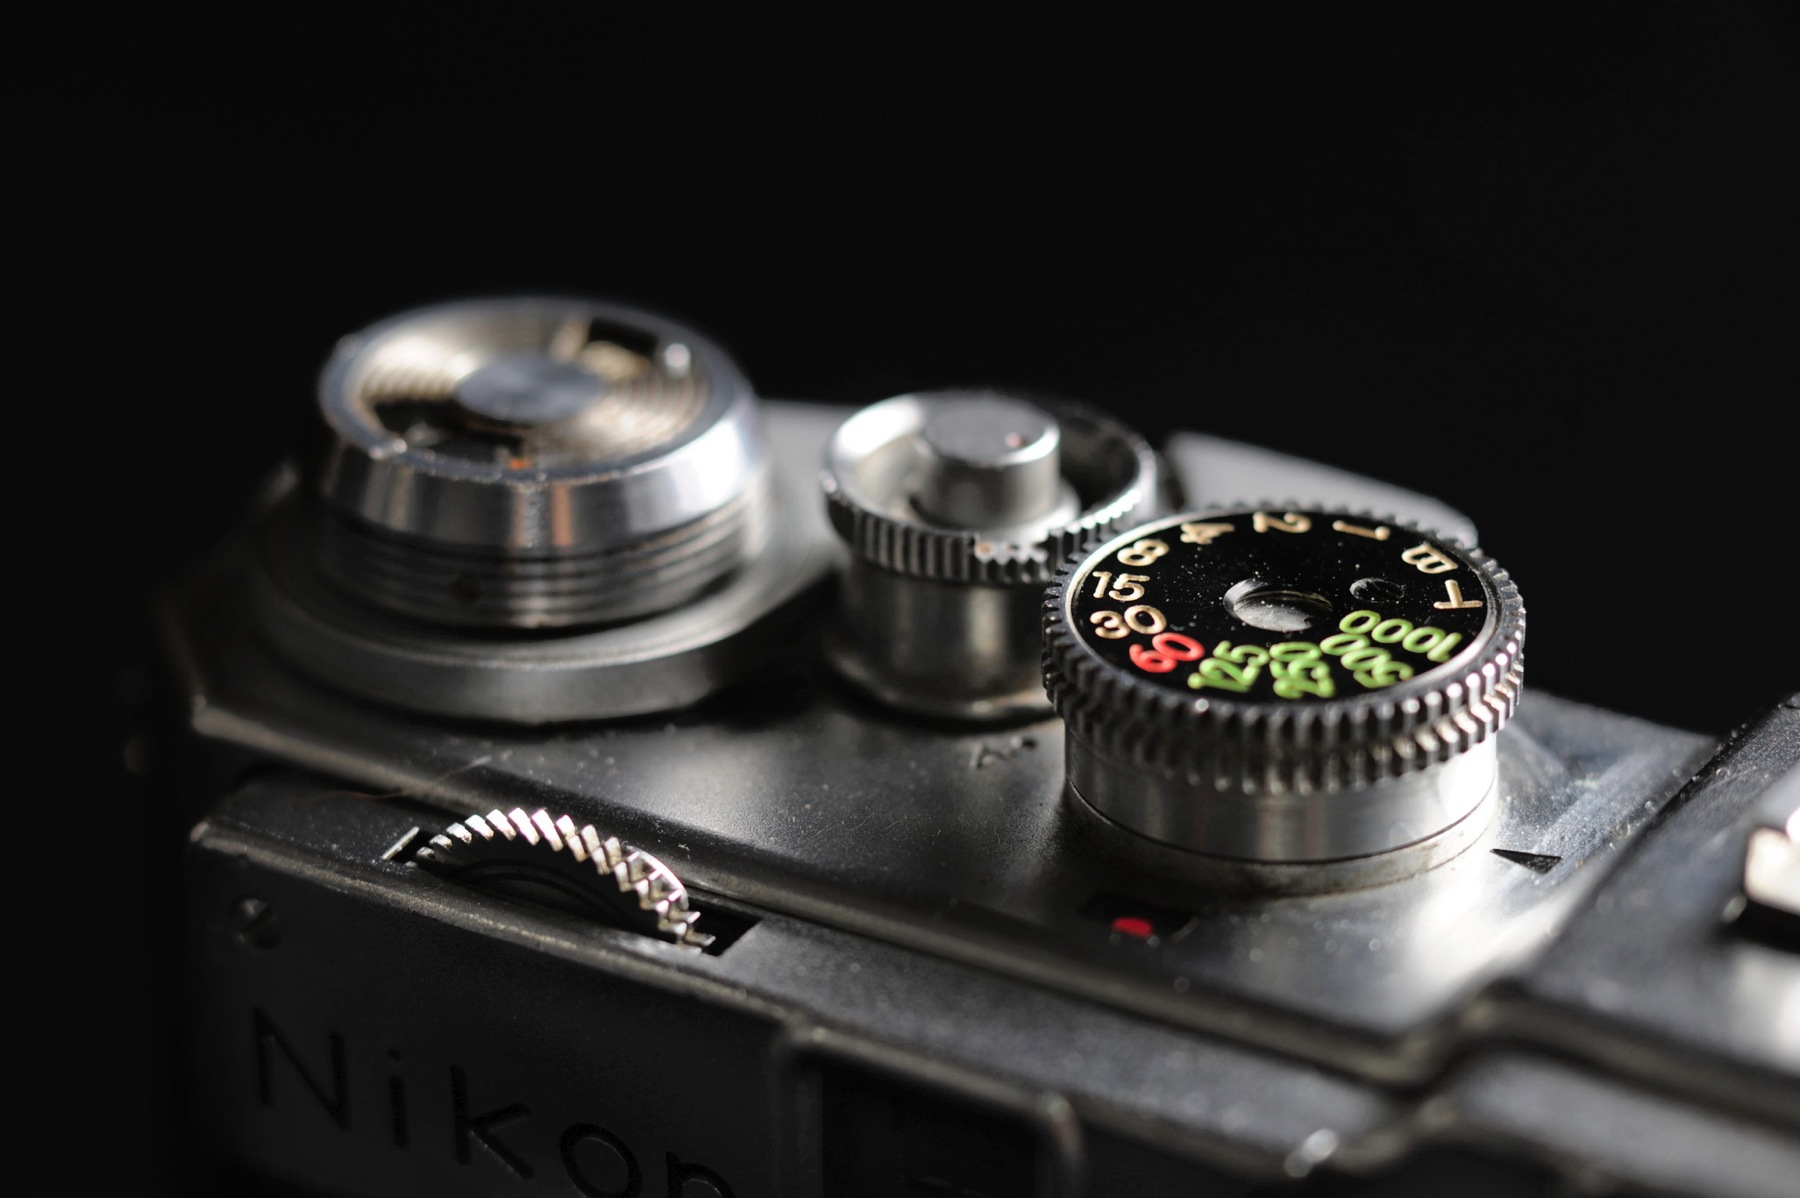
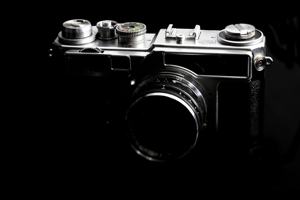
The SP’s build quality is fantastic. Like a precision watch, it exudes a feeling of quality and purpose. Everything has a reason to be, the styling is defined simply by both the mechanics and how the photographer is meant to interact with it. I’ve used many manual cameras, and much of this is true of others, but the rangefinder mechanism is what really sets it apart from everything else I’ve used.
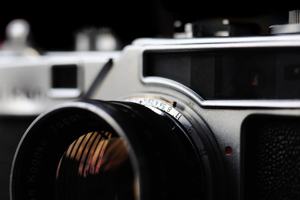
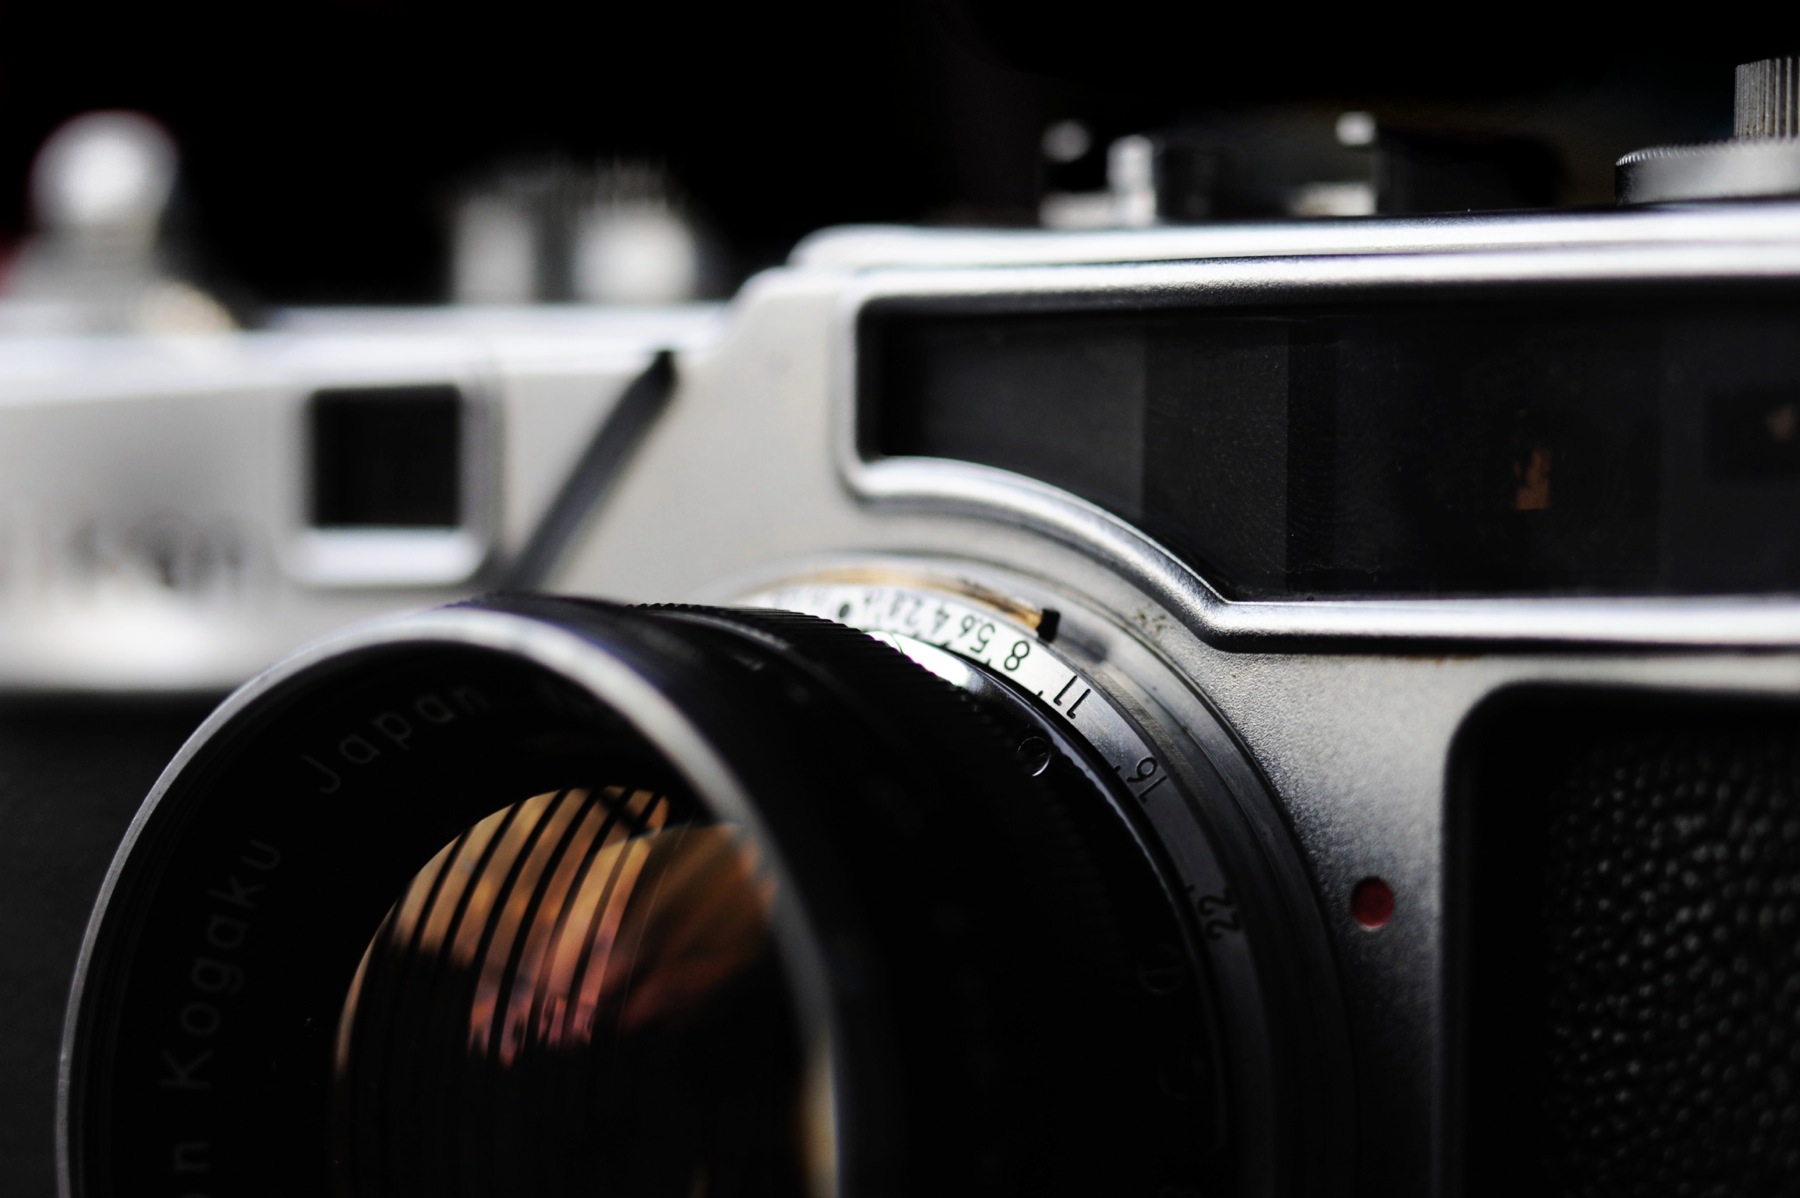
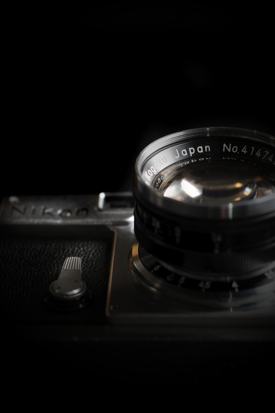
The front of the SP is dominated by this long viewfinder window. Something odd for any camera, and largely the reason I think it looks so good. The window is elongated because of another oddity: it has 2 viewfinders. The primary one, with brightlines for 50mm, 85mm, 105mm, and 135mm, and a smaller wide-angle finder for 28mm and 35mm lenses without an external finder. This allows it to have a nice massive viewfinder with a 1x zoom factor on the primary window, while still being able to frame for 28 and 35mm lenses. Though if you’re spending much of your time at the wider angles, that viewfinder isn’t nearly as nice. Having a 1x magnification finder means I can keep both eyes open while shooting and things look perfectly normal. I keep both eyes open on SLRs at times, too, but it’s much more natural this way. However, being left-eye dominant means I do have trouble focusing without closing the other eye.
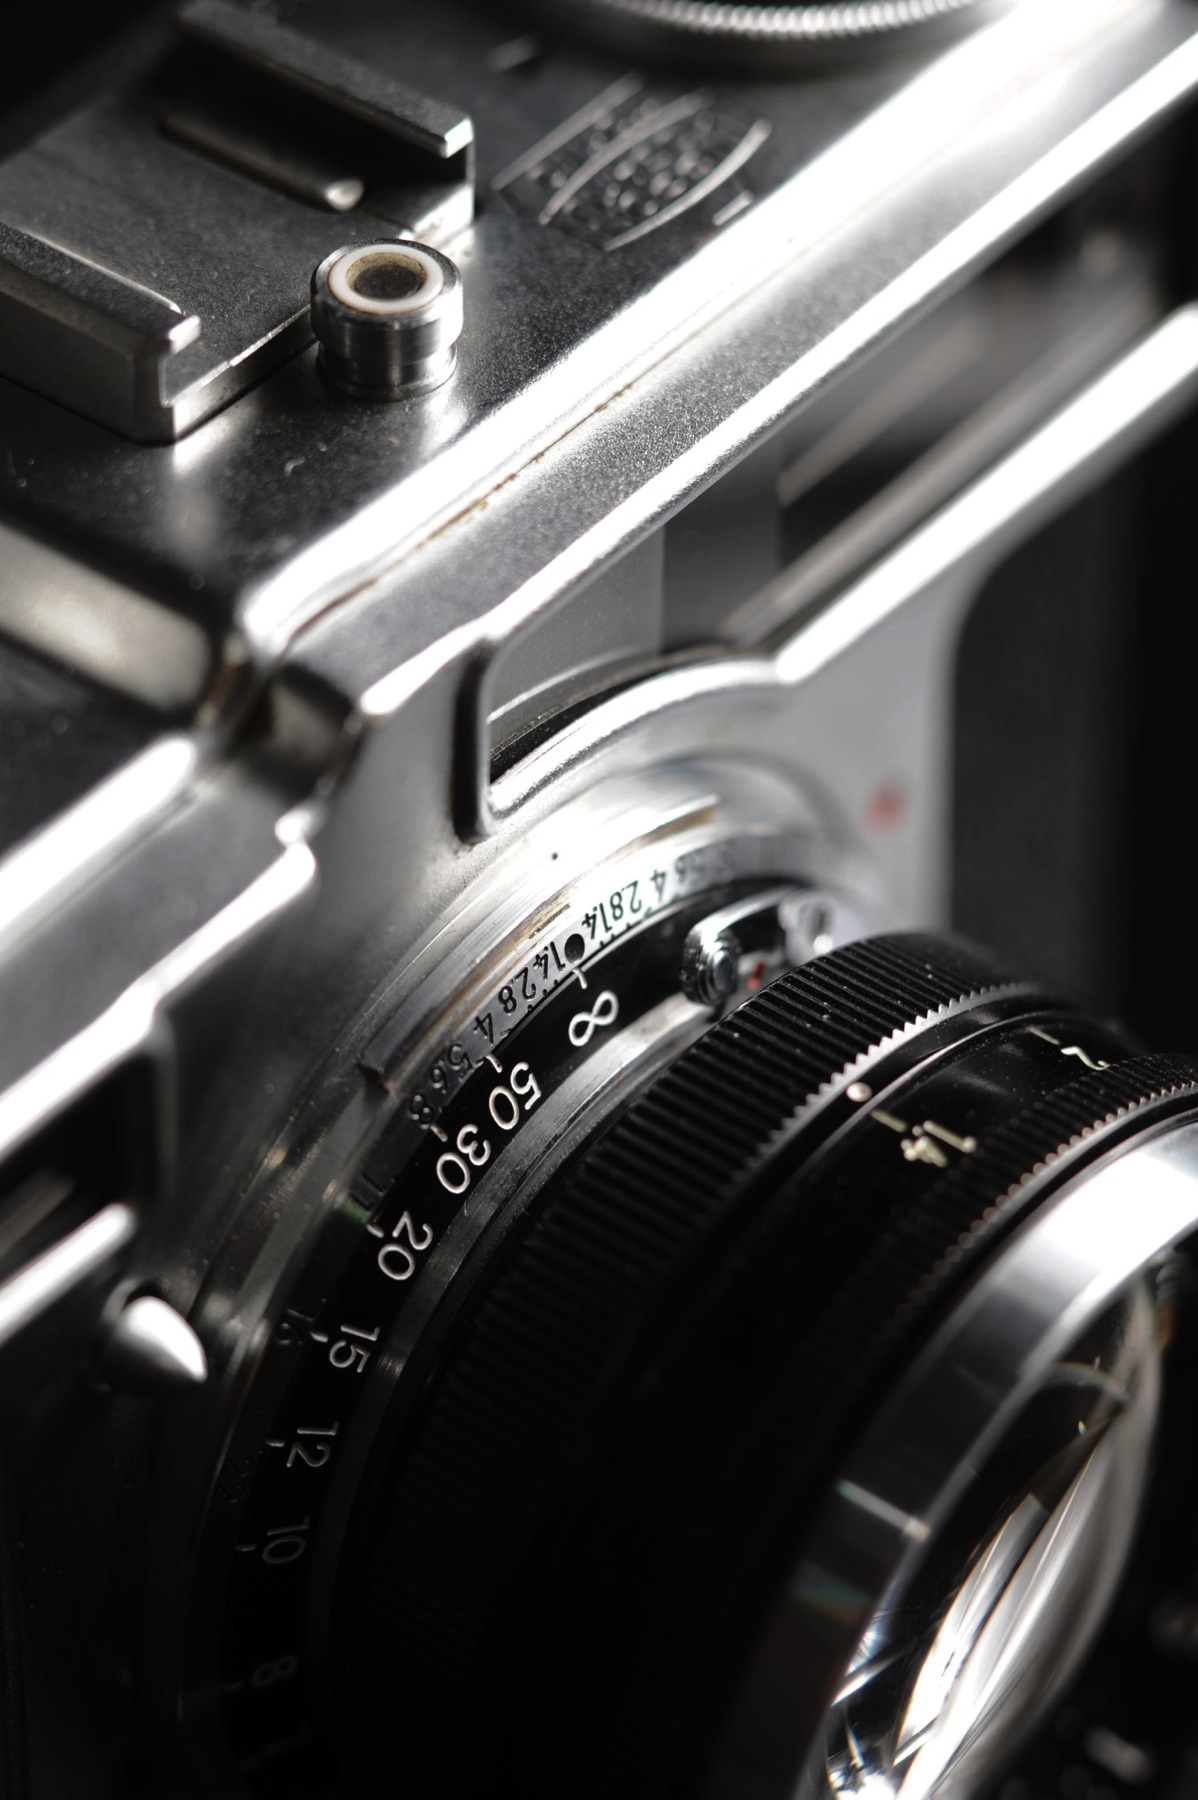
I’m not sure how bright the rangefinder originally was on my SP, but I know they dim over time. I haven’t had much trouble seeing it to focus so far, but I’ve only had this camera a few hours.
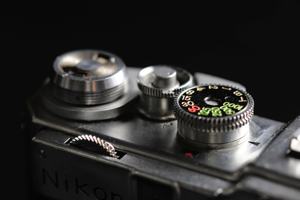
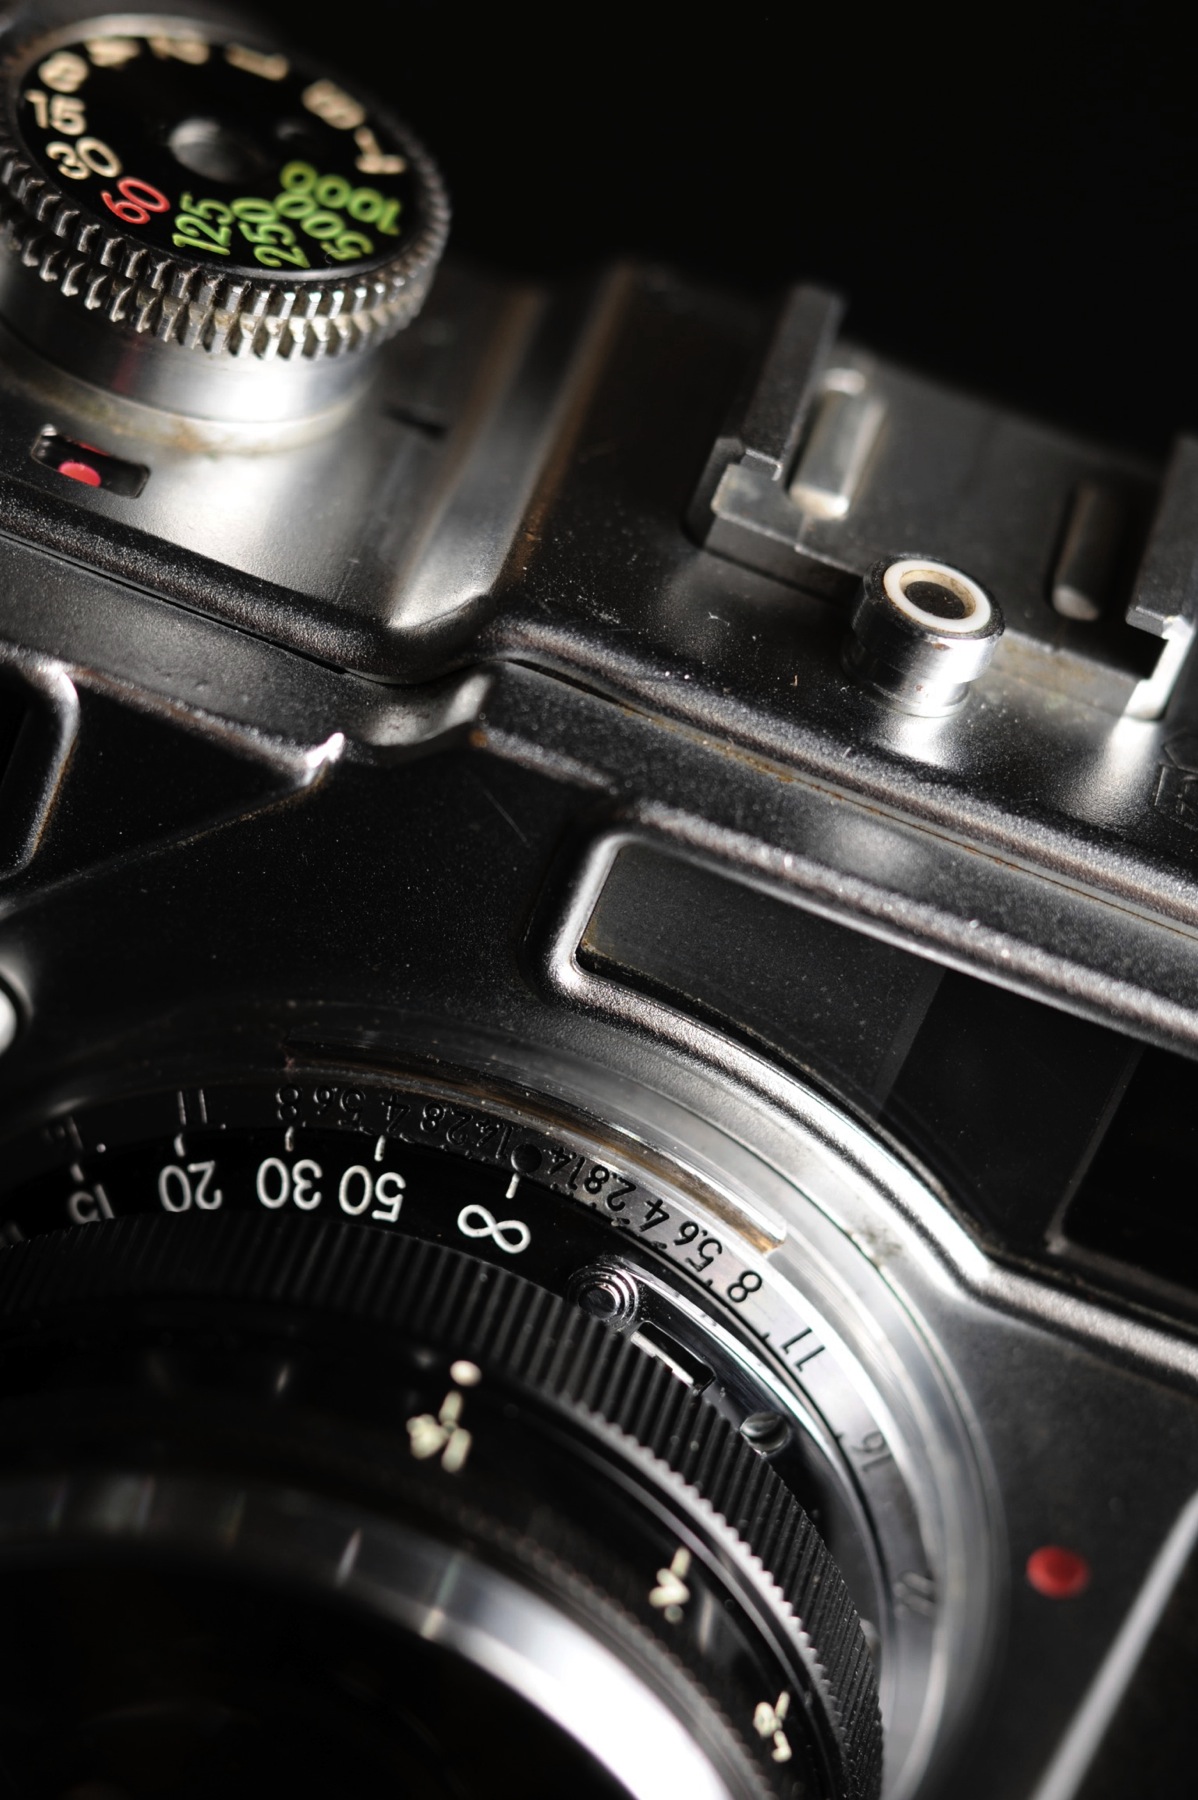
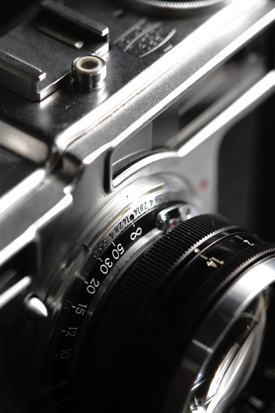
In front of the shutter release in the picture above you can see this table saw-like device. This is for focusing the lens, something I find amusing to do from the camera body. Unfortunately, it also feels somewhat like a table-saw against my fingers; I hope originally it was a bit smoother to turn.
Now all that’s left is for me to load it up with film and do the one thing that matters: shoot with it. I’ve been looking forward to the digital mirrorless interchangeable lens camera market expanding (and can’t wait for the Fuji X100), but maybe if the SP helps me take photos that look as good as it does, I won’t need to wait.

I can’t believe it’s been 2 months since I’ve posted here on my blog. Filterstorm has really been eating up that much of my time. If you’ve been following Filterstorm on Twitter, you know I’ve been talking a lot about Filterstorm 1.5 and all the work I’ve been doing on it. Well, today I’m renaming it Filterstorm 2, since it’s such a massive overhaul of the original version.
I’ll go through a quick sequence of screenshots of my process for a photo I took yesterday of a snow leopard trying to stay cool.

Above is the original photo, taken with my Nikon 85mm f/2.8 PC tilt/shift lens. It’s very low contrast largely due to the glass the photo was taken through.
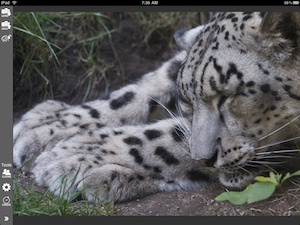
Here’s the photo loaded into Filterstorm 2. The first thing you’ll notice if you’ve used Filterstorm before, is that the top bar is gone, and now there’s a bar on the side. Rather than buttons that reveal popovers which cover the image, this bar pulls out a drawer which covers the image.
In the old versions of Filterstorm, when you were making, for example, a curves adjustment, the popover would almost certainly be covering part of the image. If you wanted to see that part of the image, you’d have to exit the popover, and reposition the image. The new drawer can be opened or closed at any time, hiding the controls whenever you want to see more of the image.
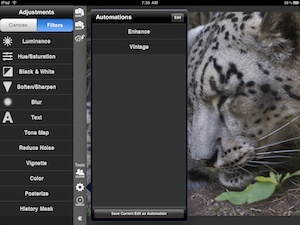
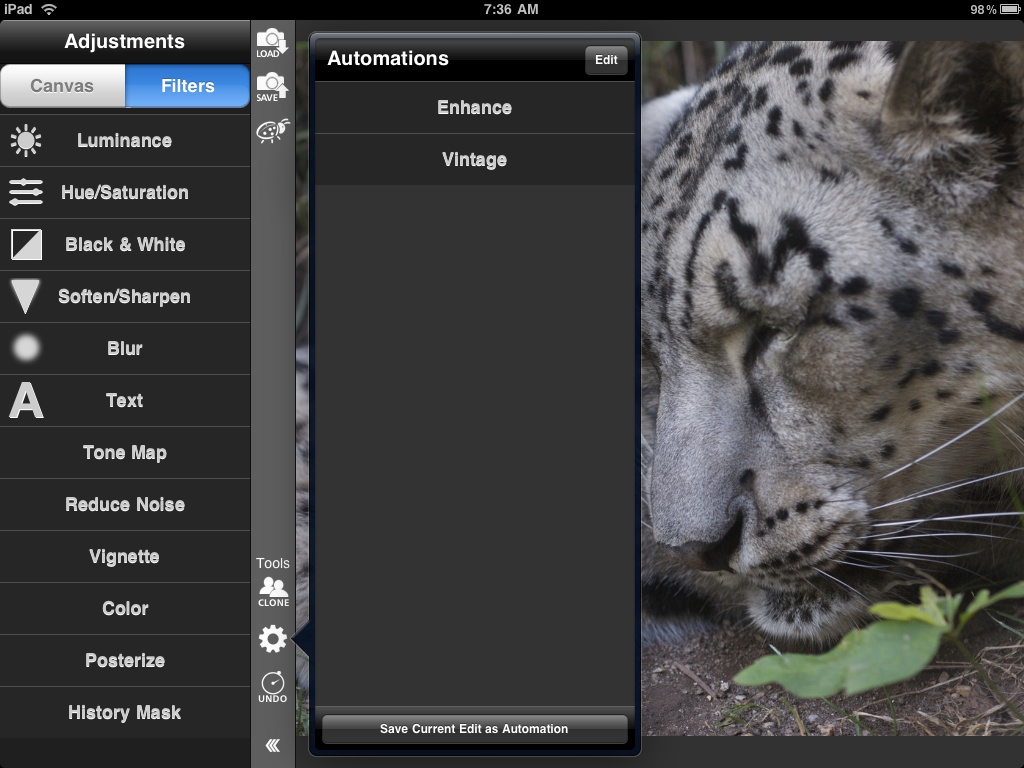
Here I’ve pulled out the drawer, and opened up the Automations menu (the gear icon). Automations are saved sequences of edits that you can re-apply to any image. What’s showing here is “Enhance” and “Vintage”, what are for now the only built-in automations.
If you’ve edited an image in a way you will want to do to a number of other images, open up the automations menu, and hit the save button on the bottom. It will let you name a new automation based on what you’ve done to the image you’re working on.
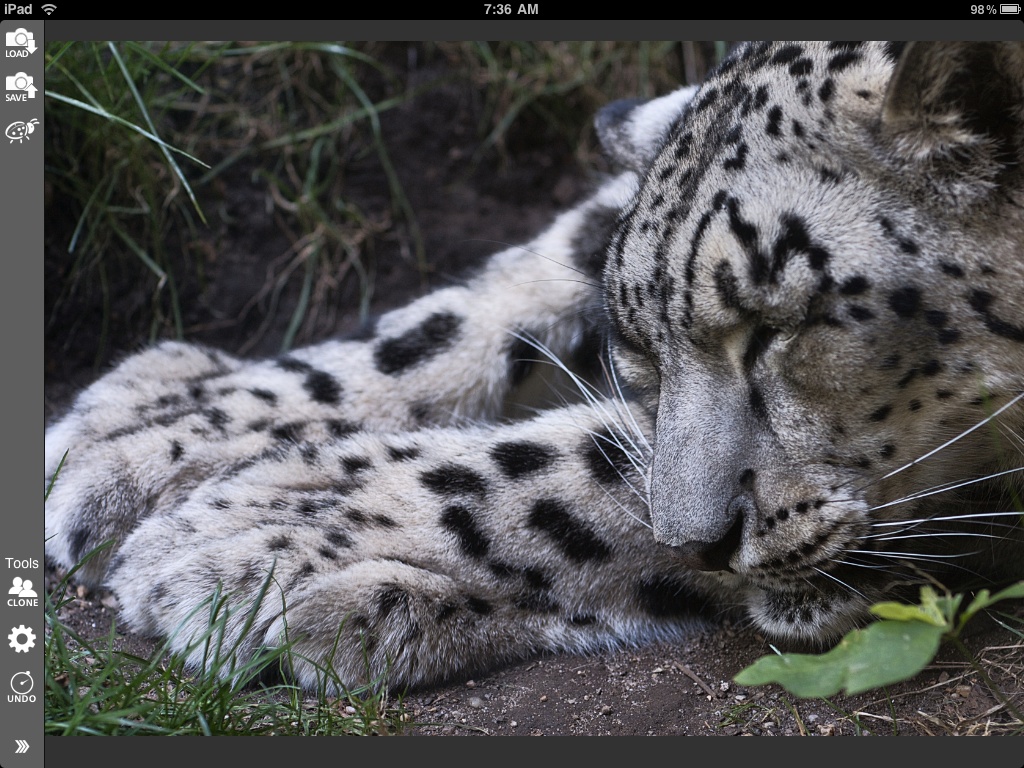
Here I’m applying the “Enhance” automation, which applies some tone mapping and curves adjustment.

This is the result of my built-in enhance button. The contrast level is much better than in the original.
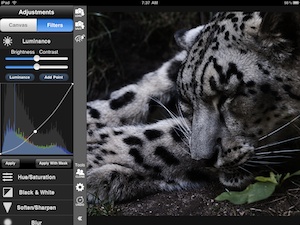
Here I’ve pulled out the drawer again, and tapped on the luminance button, to open up the luminance controls. I’m planning on darkening the background to make the snow leopard pop more, so I’ve pulled the curves down.
In Filterstorm 1, I would first choose brush mode, (or color range mode, or gradient mode), then set my adjustment to the way I wanted it, but things have changed in Filterstorm 2. Now the filter is always the first step. So when I adjust my curves, I have 2 buttons on the bottom to use to apply it. The “Apply” button applies the filter to the whole image, wheras the “Apply with Mask” button lets me use the brush, gradient, and color range modes.
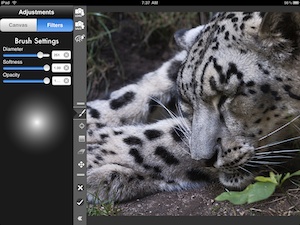
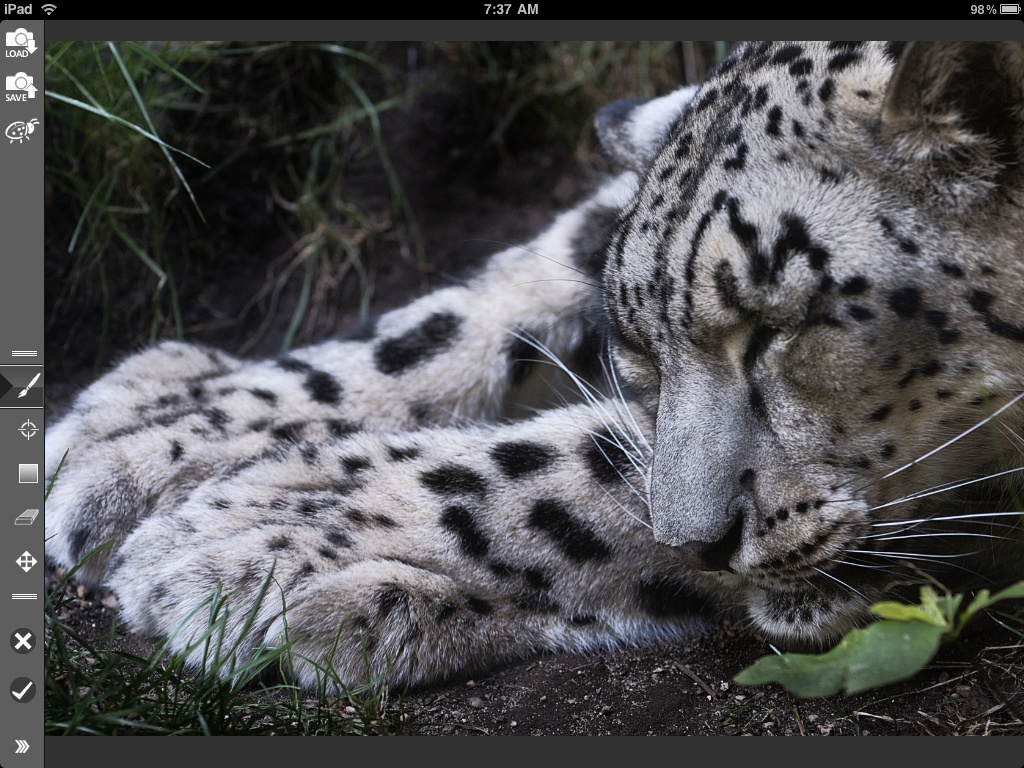
Here I’ve hit “Apply with Mask”. You can see the toolbar has changed. This is what it looks like in what I call “masking mode” which contains all our old controls. The beauty here, is now I can switch between the modes and apply the same adjustment in multiple ways. I can apply it via gradient, and then take my brush and add the filter to different areas of the picture, too. I could also take my eraser, and remove part of how the effect was applied by gradient. This makes all the tool modes, especially color range mode, much more flexible and powerful.

Here I’ve closed the drawer (still in masking mode, you can see the indicator shows I’m brushing), and have brushed on my curve change to the background. Now the ground beneath the snow leopard is more natural, and the area above his paws is less distracting.
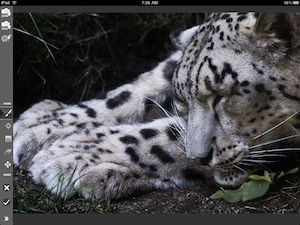
The check and x buttons at the bottom of the toolbar take me out of mask mode. The check button will approve my masking changes, and the x button will cancel them.
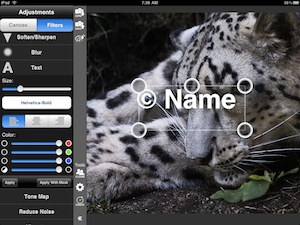
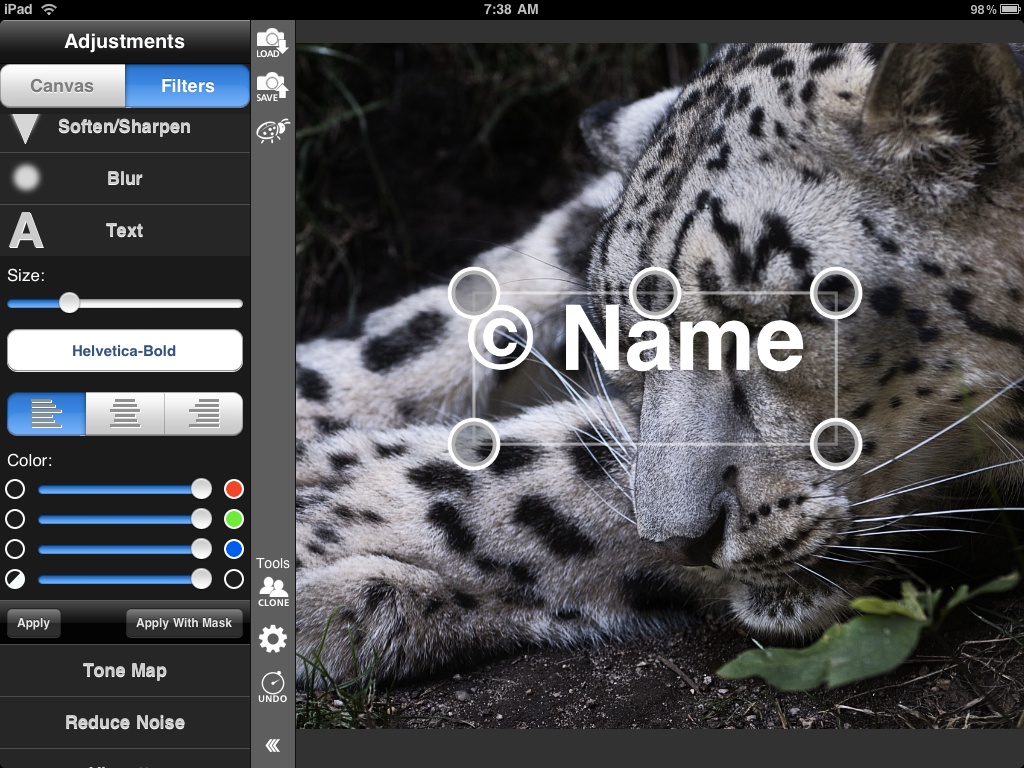
Another new ability in Filterstorm 2 is one a lot of people have asked for: text. I’ve opened up the text controls here, and you can see the default text has popped up. Like the default suggests, I’m going to use this for a watermark.
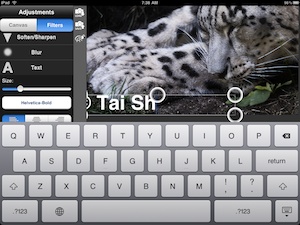
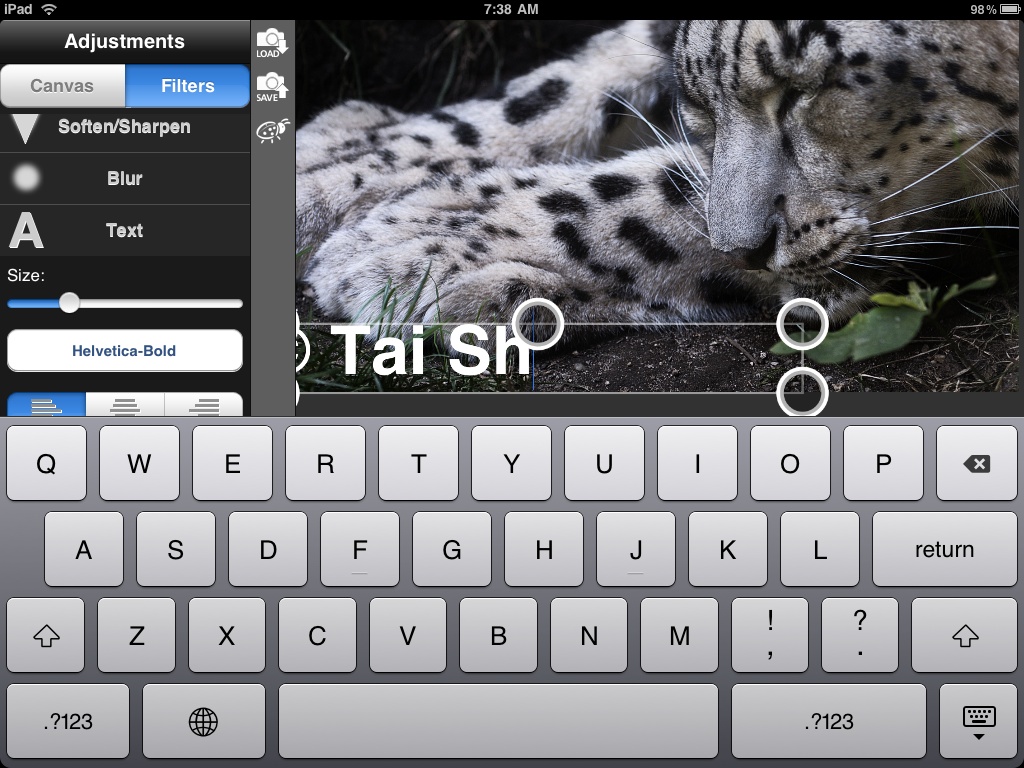
Here I’ve placed the text and am typing in my name.
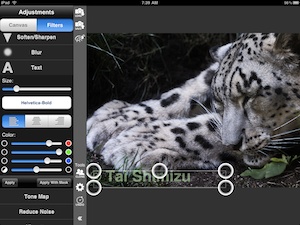
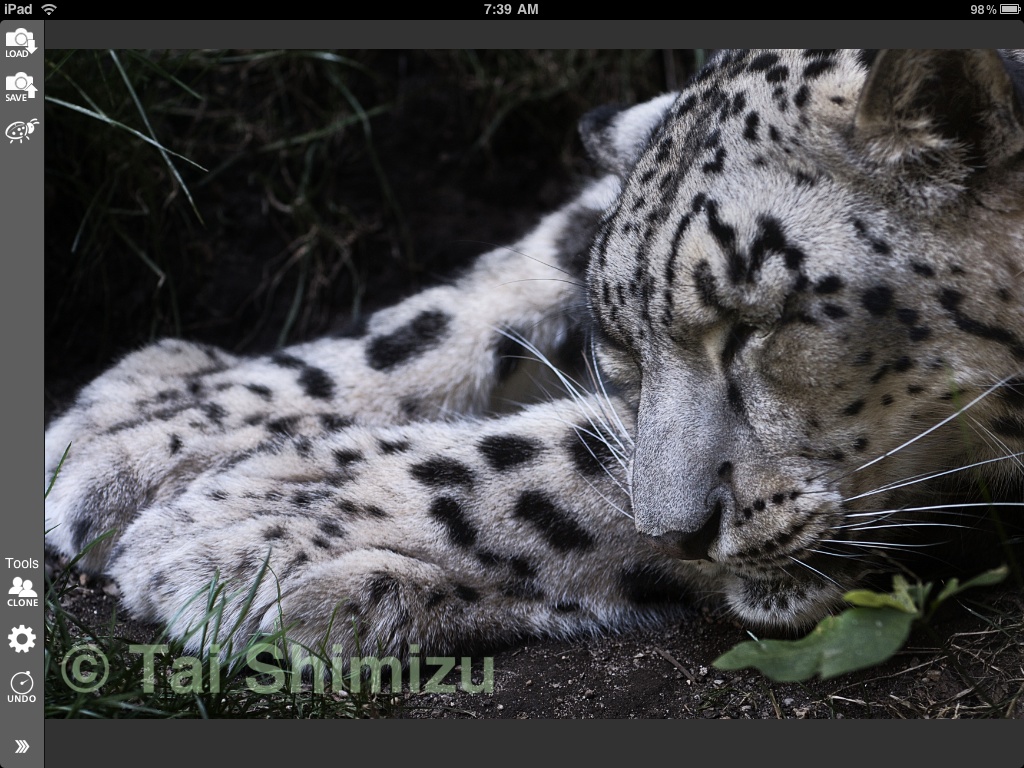
The text tool has the ability to change the size, typeface, color, alignment, and opacity of the text. You can also use text in masking mode. This allows you to apply effects such as having the text fade in with a gradient. I’ve chosen a translucent green for this image. Text works with the automation tool, so if you tend to put watermarks on your image, you position the text the way you like it, and save an automation so you can do it quickly every time.
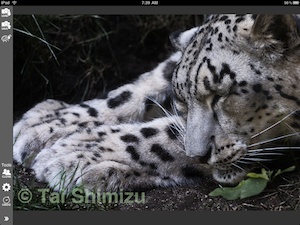
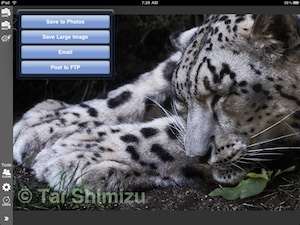
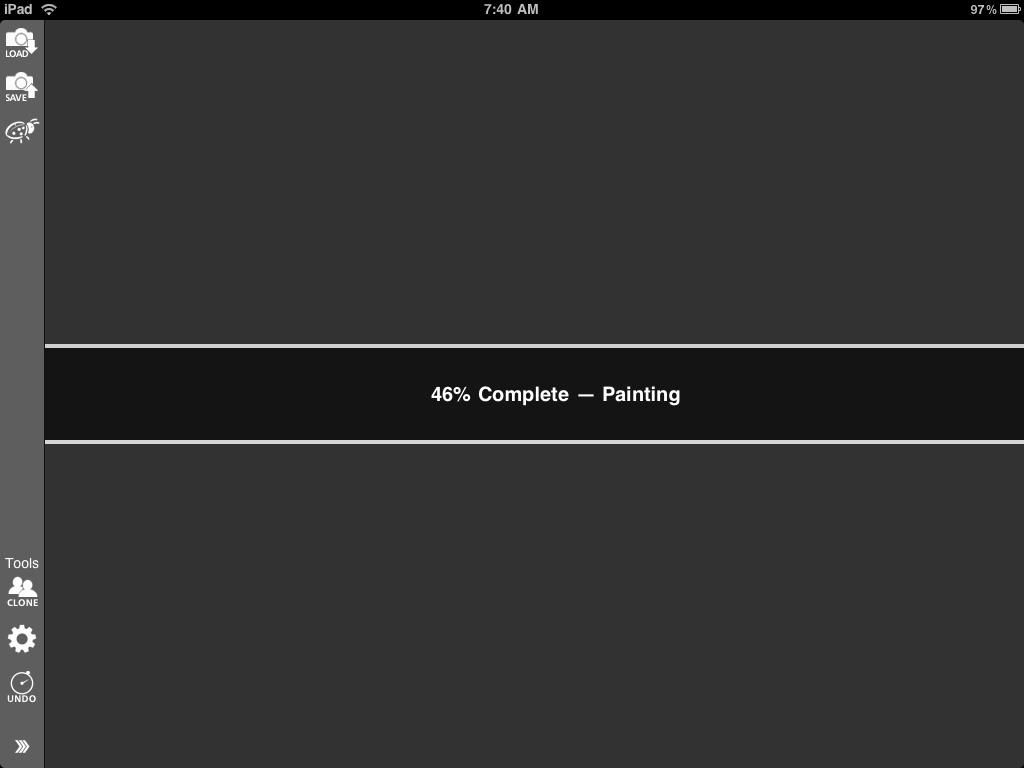
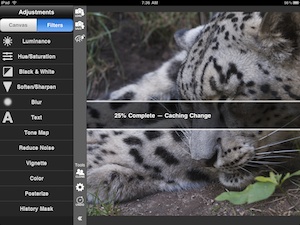
This “Save Large Image” button is a placeholder button for a very big feature of Filterstorm 2. Filterstorm 2 increases the maximum dimension of an image to 3048px, which makes the final version of this image 6.2 megapixels, good enough for web and print up to a pretty decent size.
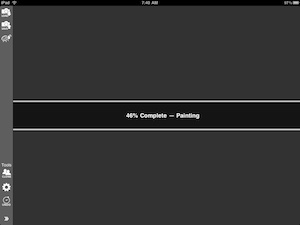
iPad is very limited on RAM, so the export process takes almost everything out of RAM, including the image that was being displayed and shows you a progress indicator. This image took about 40 seconds to export.

And here it is, the 6.2 megapixel final image exported from the current beta of Filterstorm 2. It’s still a few weeks away, but is a fantastic update. I hope you’re looking forward to it!
This is my first update entirely from my iPad. I edited the photos on the iPad on Filterstorm, uploaded them via FTP and FTPOnTheGo and am typing this up in Safari on iPad. Typing up the post certainly isn’t as convenient as on my Mac, but the rest of the process was a joy, and if I had my keyboard dock with me, this part wouldn’t be bad, either.
All photos were taken with the Nikon 300mm f/4.5 ED-IF
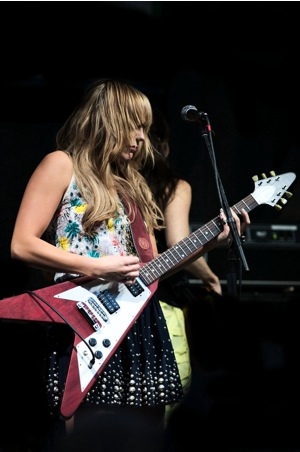
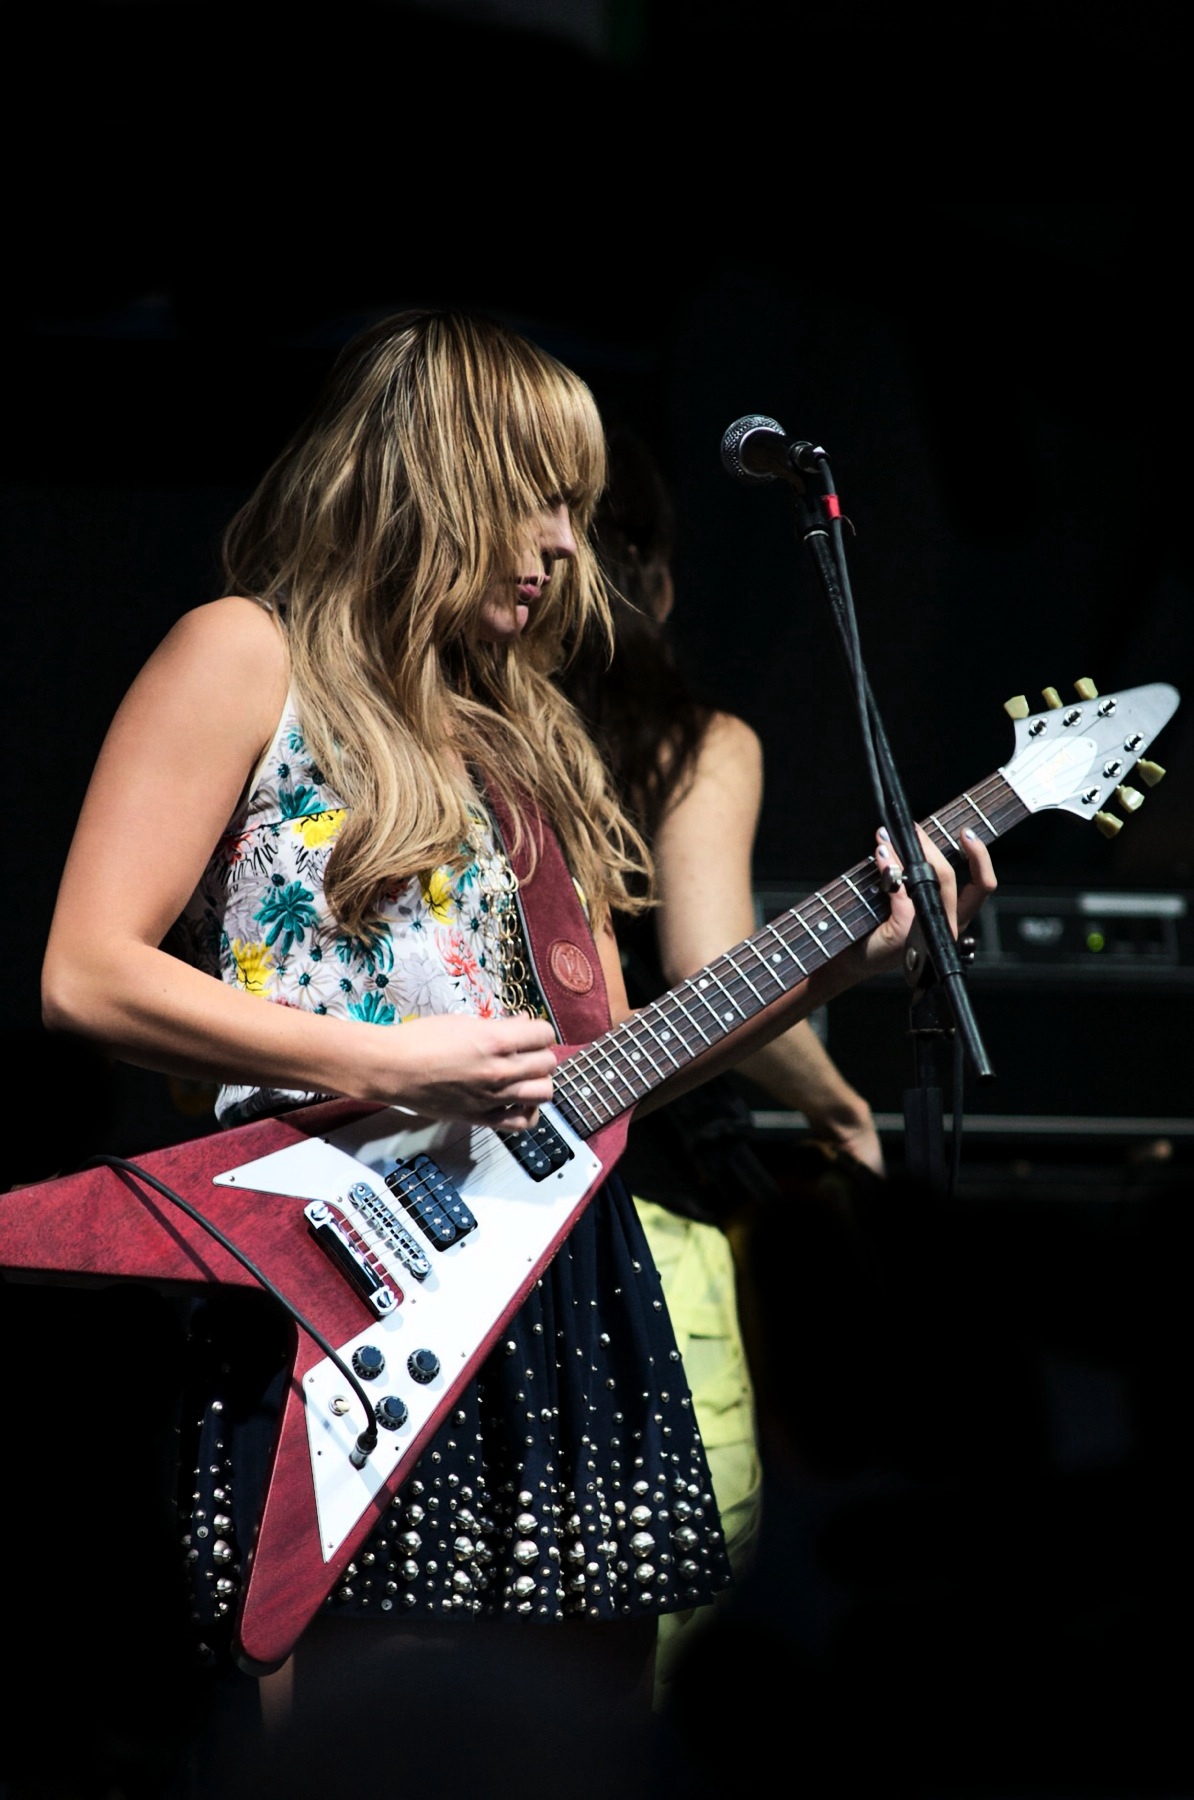
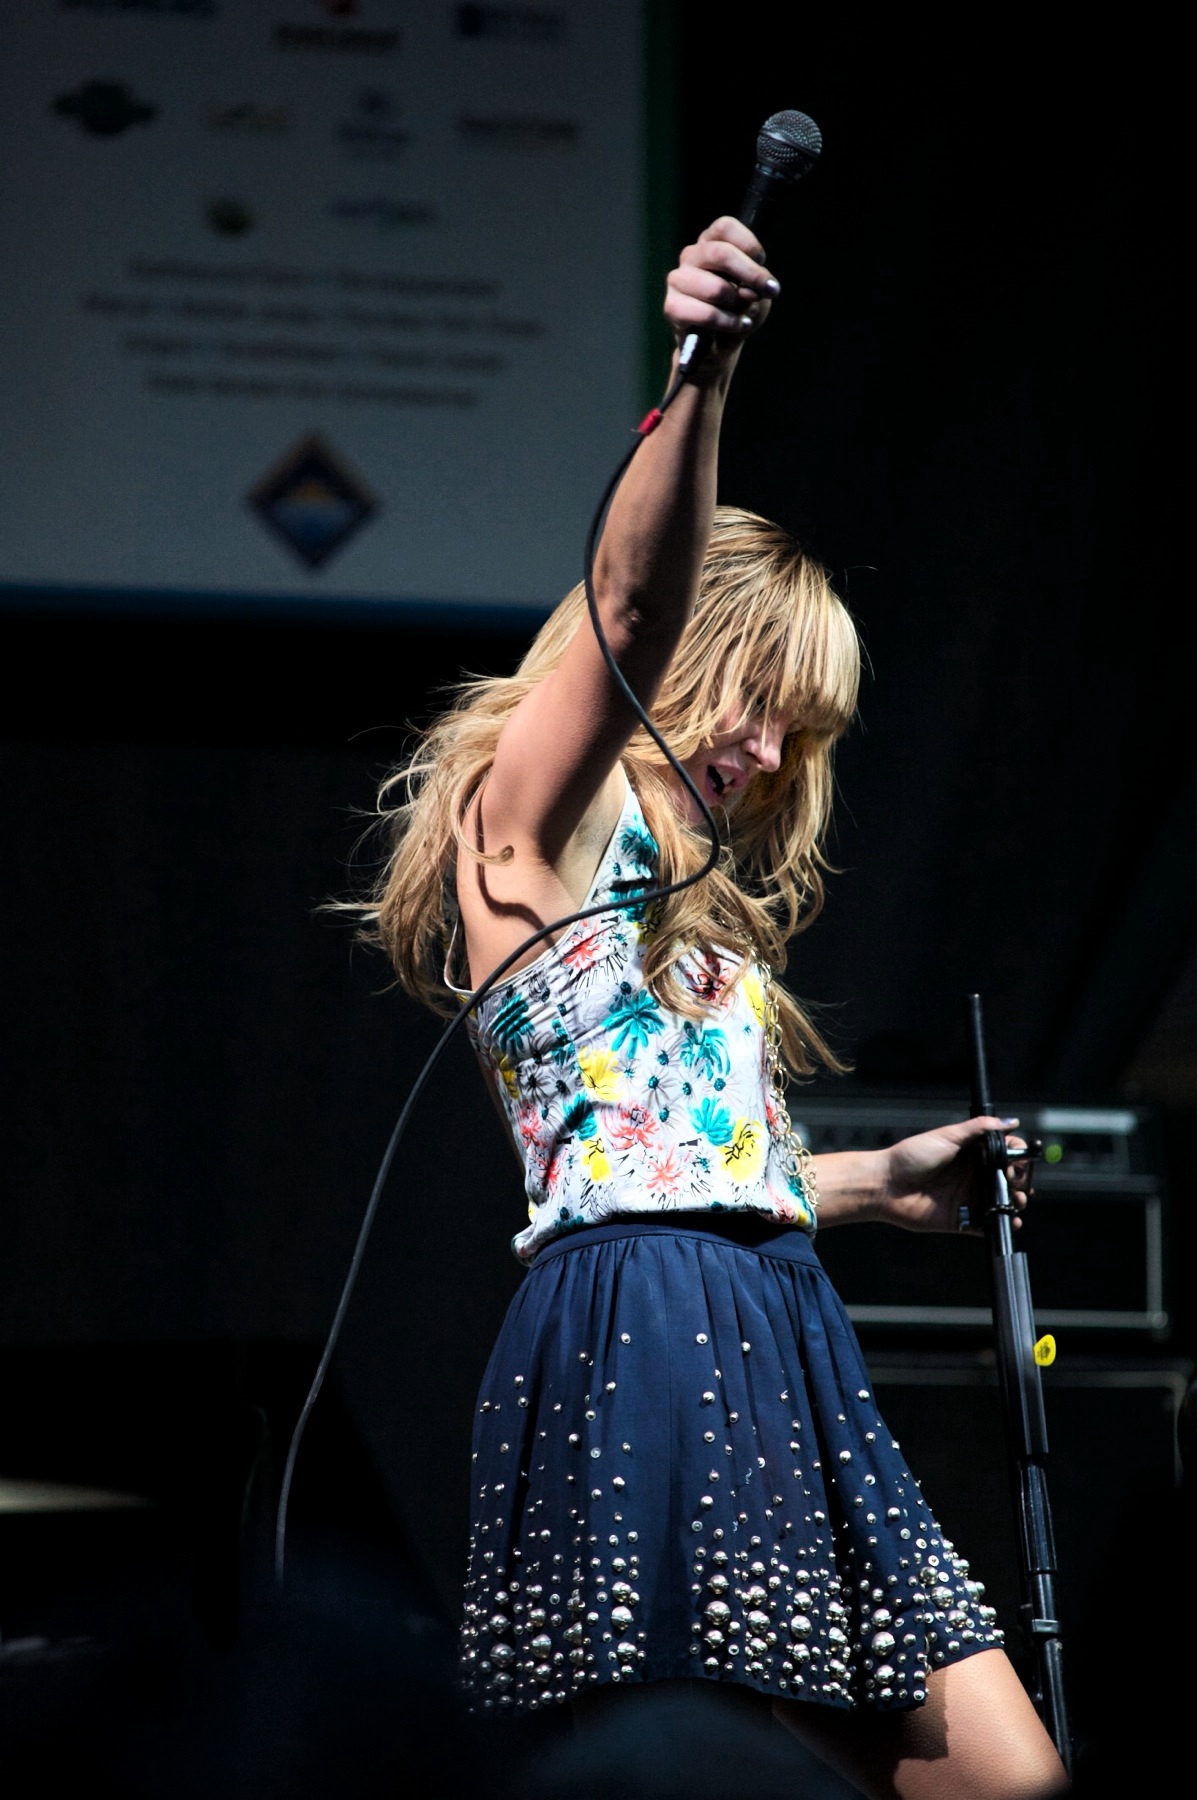
This is my first photo post in over a month. I’ve been concentrating so much on Filterstorm development in my time outside of work. Thankfully I was dragged out by some friends to this free Grace Potter and the Nocturnals concert outside Grand Central for Earth day.

I unfortunately didn’t really get the chance to enjoy the free concert very much, as my D700 was having problems. It won’t review photos on the LCD after taking them, won’t format the memory card, and won’t enter live view. I was shooting the concert in the hope the pictures were actually being saved. Thankfully they were.

If anyone’s experienced this problem before, drop a comment or send an e-mail. I’m gonna try a firmware update/restore and see if that does the trick. If not, I’ll be sending it out for repair.


Filterstorm 1.0.3 came out today, and brought much needed speed improvements. I also submitted 1.0.4, which is probably about where I should have been a week ago for iPad’s launch. This means work begins on 1.1; finally I get to work on new features.
All this work has kept me from posting anything photography related here in some time, but I do promise I’ll get back to that once things settle down a bit.
All content © Tai Shimizu unless otherwise indicated.